
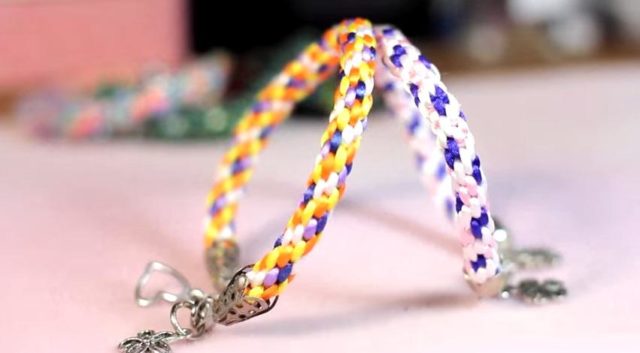

History of origin and varieties of cords
This technique was originally used to weave the samurai belt and sword straps. But that was in ancient times; kumihimo weaving reached the peak of popularity in the 20th century during the hippie era. Now you can meet football fans dressed in multi-colored scarves made with the kumihimo technique.
Japan is officially considered the homeland, but some scientists are trying to prove conjectures about the origin of kumihimo in Scandinavia. In 550, Buddhist rituals were performed in certain decorations. Initially they were woven from leather and dense threads, and only later did looms come to the aid of the masters.
Variety of patterns
Kumihimo baubles can be created in completely unusual ways; there are no limits to the imagination of needlewomen.
See also: A few tips on how to use a crocheted headband. We knit bright hair bands for girls with a crochet hook Knitted hair bands
There are several main varieties:
- light chain;
- machine weaving;
- fishtail;
- wide product.

Looking at kumihimo bracelets made by specialists, you can see how diverse the kumihimo technique is.
Color palette
Colored threads on the wrist have a special meaning. It is believed that some add strength and protect their owners.
Let’s take a closer look at each color:
- red is the color of energy, fire, courage and balance. This shade is a strong talisman against the evil eye;
- pink is the color of tenderness and love. Lovers with this shade feel calm and peaceful;
- orange is the color of energy and fullness of perception of life. This color shows a positive attitude towards new acquaintances and communication;
- yellow is the color of creativity and vitality. This shade helps in achieving goals;
- green – embodies the power of nature. The green thread cleanses the soul of evil and negativity;
- blue – gives an inspiring mood. It is one of the calmest colors;
- white is a symbol of absolute purity. It is a sign of the right path;
- gray – in a pure shade this color carries negative energy, but if it is close to silver, it is associated with healing;
- black – considered a negative color, but it means a strong position in society.


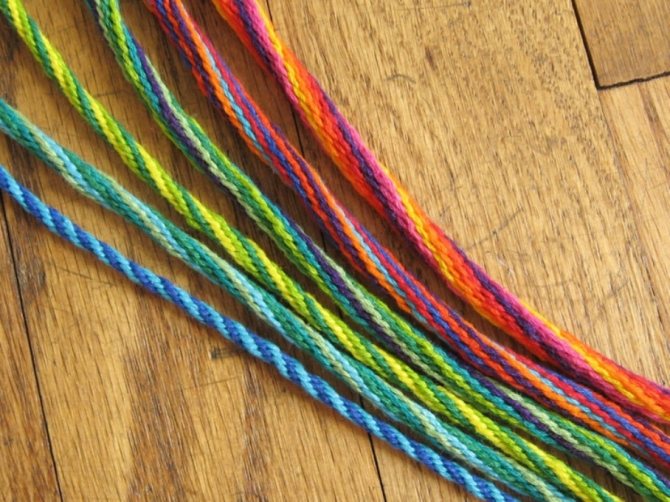

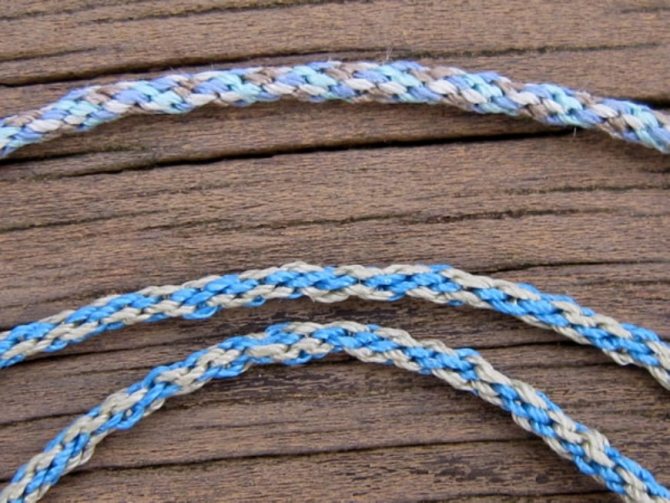


Fenichki – what is it??
A fenichka is an accessory in the form of a bracelet, made in the form of weaving from threads, ribbons, beads and other materials. Most often it is woven by hand, and its creation contains the meaning of friendship between two people. But the last point is not necessary, because nowadays many perceive it simply as a decoration.


The prototypes of modern baubles are aboriginal and Indian jewelry, who exchanged similar bracelets to establish a spiritual connection. Later, this idea was borrowed by supporters of the „hippie” movement, who thereby confirmed their attitude to this brotherhood.


The classic option is baubles woven from floss threads. They can be monochromatic or multi-colored. In addition, depending on the type of weaving, different patterns and designs can be depicted on them. The colors on baubles have a certain meaning, thanks to which it was possible to determine who a person is.


Now baubles made of threads and other materials are a fairly popular accessory, and you can weave them yourself or buy a finished product. They go well with summer and spring outfits. Moreover, both girls and boys can wear them.


Tips for weaving fenichki
Weaving baubles is quite an interesting process, but difficulties can also arise with it. And the first problem for beginners is incorrectly determining the length of the threads. First, you need to leave a length so that the bauble can be worn on the hand. Secondly, depending on the complexity of the weaving, threads of 80 cm or more are needed. Therefore, the more complex the pattern, the longer the thread should be.

At the beginning of training, you can simply fasten the threads in the form of a simple knot. However, to make the work look neater, you can use one of the proposed methods:
- Fastening the threads with a pin. All threads should be tied to a pin, and then it can be attached to a piece of fabric or even to jeans.
- Fastening the threads with tape, electrical tape or adhesive plaster to the work surface.
- Tying knots with a leading thread around the base of the bracelet.
- To prevent the end of the bauble from being disheveled, you should tie it in a knot or braid a tight braid.


Another important point is the quality of the threads. It should be cotton wool. But since it can be dull, manufacturers carry out the mercerization process. You can also weave baubles from silk, woolen and staple threads.

If you run out of thread during weaving, which often happens when creating complex patterns, you must do the following: from the wrong side, a new one in the same color is attached to the finished thread.
If you want to create a bauble according to tradition, you need to know the meaning of the colors:
- red symbolizes love and passion,
- green – hope and faith,
- white – innocence and freedom,
- black – loneliness and independence.

Fenichka is a great decoration that is suitable for summer. And the weaving process itself can become an interesting hobby, because there are many patterns of varying complexity, according to which you can create a beautiful and unusual bracelet. Also, a hand-woven bauble can be a nice gift for a girl or a friend.
Finally, an easy master class on weaving the simplest thread baubles, which will allow even inexperienced beginners to get fired up with the idea of weaving.
How to weave Japanese cords – kumihimo fenichki
Today I will tell you about what kumihimo is, about the art that I have been engaged in for several years, and of course, how to learn to weave Japanese kumihimo baubles, that is, kumihimo cords, as they are often called.
What is kumihimo
In Japanese, „kumi-himo” means „weaving cords”; this type of needlework arose around 550.
At first, kumihimo cords were woven on hands from threads and leather straps, and later, specially for this art, looms were invented: marudai („round stand”) and takadai („square stand”).
There are other, lesser-known devices – kakudai, karakumidai, naikidai. Cords of a certain type and pattern were woven on each machine.
How kumihimo was used
In Japan, cords woven with the kumihimo technique were used in various spheres of life. They occupied an honorable place in religious rituals and ceremonies: in decorating temples and sanctuaries, decorating statues of gods and ritual utensils.
Kumihimo baubles served as cords for clothes and armor, they were even used to fasten harnesses on horses. Kumihimo woven from threads of certain colors were considered amulets against evil spirits and talismans bringing good luck.
The appearance of kumihimo and its development
The needlework appeared in 550. The first kumihimos were created by hand from yarn or leather straps. Earlier, tightly woven bands were used as a belt for a woman’s kimono. The samurai, on the other hand, hung a sword on them, tied equipment and fastened the horse’s armor. Kumihimo was used not only for practical purposes. Its elements were used for decoration, religious activities. They also decorated temples, placed them on statues of gods. Decorations were used during ritual ceremonies.

Over the years, this technique gained popularity among hippies. Informal woven bracelets, homemade hair ties. The jewelry was named – baubles. After millennia, the technique not only did not lose popularity at home, but also gained worldwide distribution. It is used to create jewelry, wardrobe items, belts, shoelaces.
The purpose of modern kumihimo
In modern life, ancient Japanese handicraft is used not only for jewelry and clothing details. With its help, they create chains for glasses, cords, fastening flash drives, pendants, bookmarks. They decorate photo frames, animal collars, curtain ties.
It is commonly believed that patterned ribbons serve the owner as a talisman, bring good luck, and also help to find true friends. Funny ornaments are often used to create creative jewelry.
Examples of materials:
- braid.
- Beads.
- satin fabric.
- Leather.
- silk fiber.
- wire.
Traditionally, Japan was famous for products woven from silk. For modern kumihimo, biron, yarn, artificial silk, acrylic, and mohair are used. Any number of threads of different textures is taken. Their number affects the thickness of the future product. Cotton is more suitable for needlework. The thicker and coarser the yarn, the more voluminous the braid will be. Baubles and thin, flat cords are recommended to be made from iris and floss.

Creating disks for Japanese cords
Hearing that special devices are needed for weaving kumihimo, fans of Japanese culture are usually upset. However, there is no reason to despair, because clumsy cord machines are a thing of the past. Currently, inexpensive discs made of plastic or fiberboard, which can be bought in stores, are used to create jewelry from threads. With the help of such looms, needlewomen manage to weave kumihimo of any length and complexity.
If for some reason you cannot buy a ready-made kumihimo disk, you can easily make it yourself. For this you will need:
- a sheet of hard cardboard or other dense material;
- a ruler
- a compass;
- a simple pencil;
- scissors.

Photo 2-3. Initial stages of weaving kumihimo.
On a sheet of cardboard, using a compass, a circle with a diameter of about 15 cm is drawn. After cutting it out, a small hole for threads (about 1 cm in diameter) is made in its center, and 32 divisions are marked along the edge at the same distance with a pencil, along which cuts are made with scissors about 1 cm deep. To make it more convenient to weave braids, draw 16 sectors with a pencil on the surface of the disk and a square marking the start (photo 1). The resulting machine is versatile, it can be used to create different models of kumihimo. To prevent the threads from tangling with each other during the weaving process, you can additionally make reels for them in the form of cardboard tubes with a diameter of 1 cm and a length of 5-6 cm.
The principle of weaving
It is not difficult to disassemble kumihimo weaving patterns if you know the basic principles of this embroidery. For example, consider them on 8 threads, but real cords consist of at least 16.
We take a machine with 32 slots and insert 4 pairs of multi-colored yarn into it. The starting points on the diagram are marked with dots. Then we lift the green left thread up and insert it into the left slot of the blue pair. We move the right blue one to the right of the green one.

Then we turn the disk 90 degrees counterclockwise and continue weaving according to the same principle. The most important thing is not to confuse the direction of throwing the threads, otherwise the kumihimo pattern will not work, and the cord itself will not be uniform.
A bit of theory
First you need to prepare tools and materials. Ancient samurai wove kumihimo using special round or square looms. Now there are simplified versions of them in the form of circles or squares with a hole in the middle and notches along the edges. In this article, we will learn how to weave exactly round cords. It is easier for beginners in need.
In addition to the machine, threads will be needed to implement the kumihimo pattern. Ordinary floss is also suitable for simple baubles. Of course, you can use thicker yarn or combine several of its varieties to get interesting effects.
Since cords have a large shrinkage coefficient, it is necessary to make fairly large cuts. To prevent the threads from tangling, you can use spools, bobbins from a sewing machine, or simply wind them into a ball.
Technology for beginners
Without a machine, it is impossible to create a wide belt. But you can make a small weave by hand, using improvised elements. With a little patience, you can create unique jewelry or a decorative element.
First, a homemade machine is constructed. Thick paper, plywood, foam and other hard materials are suitable for this. A circle with a diameter of 12-15 cm is cut out of the selected base, a hole with a diameter of 3-5 cm is pierced in the middle, after which the circle is divided into 32 identical sections. Along each of the lines, an incision 1-2 cm long is made. One of the resulting diamonds should be noted. This will mark the beginning.
Technology for beginners:
- 8 threads of the same length are cut. Colors are selected differently, combined with each other.
- The strands are folded in half, forming a loop, which is secured with any thread.
- The threads are lowered into the machine’s incision with the loop down and secured. There should be 2 divisions between them. For the ribbon to turn out strong, with a beautiful, even pattern, the threads must be pulled tight.
- Stringing consists in alternately transferring fibers to free cells of alternating colors. It goes like this. The right thread of the upper sector is removed, moved down and fixed on the right side. Then the left thread of the lower section is removed, moved up, fixed on the left side. The machine rotates counterclockwise, the same steps are repeated.
- Gradually, a braid with a knot and fringe at the end will form at the bottom of the disk. You must continue until the desired length of the braid is formed.
- Then the whole structure is removed from the machine, a knot is tied to fix the pattern. On both sides, the ends are aligned with scissors, tassels of the same length are formed.
Schemes are developed for weaving. The number of schemes is in the thousands. New versions of them are constantly appearing. For beginners, it is better to use the simplest 4-strand pattern. Complex schemes require the use of up to 40 thread cuts.
Features and types
According to the shape of the braid, they are classified in this way:
- round.
- square.
- 4-corner.
- flat.
- hollow.
Kumihimo masters work on wooden looms. There are 2 types. Takadai – allows you to create flat products, marudai – round ones.

How to fasten the threads
For the work to be even and tight, proper preparation is necessary, namely fastening the measured threads, which are inconvenient to hold in your hands, even if they are connected in 1 knot.
There are many ways to fasten the threads:
- tie all the threads in a knot and attach with a piece of tape to the table;
- do not tie the threads in a knot, but spread them separately on a piece of tape, which is then attached to the table;
- attach the tail with a paper clip to the book;
- tie the ends of the threads to a pin attached to a pillow;


- thread each thread separately on a large pin attached to the fabric;
- place the threads separately on a paper tablet that has a clip, put a ruler on the threads and fasten with the clip;
- thread all the threads at once separately on accessories, for example on a belt.
Main weaving knots
At the very beginning, you need to familiarize yourself with the knots on which weaving is built, so that later it will be easy to create masterpieces. Each knot has its own designation on the diagram, therefore, in order to read the „technical task” and understand it correctly, we suggest studying different types of knots and learning how to work with them.

The main knots are right and left. These are the simplest hinge elements, the difference of which lies in the location of the working thread. On the left it is on the left side of the background, on the right – on the right. Pairing these elements gives several types of knots:
- Left right;
- right left;
- left left;
- right / right.
In the future, we will have to work with these four types to weave baubles from threads for beginners.
Simple knot
In short, it is a combination of two left knots. Pay attention to the fashionable bauble patterns: a simple knot is marked with an arrow whose tip points to the lower right corner. This is where the working thread will go. The finished knot will have the same color as the working thread.
Reverse knot
It is tied by analogy with a simple knot, but in the opposite direction, connecting two right knots. In the diagram, it is marked with an arrow pointing down and to the left and indicating the direction of the working thread.
Left tatting knot
Do not be afraid of the name of this knot from the macrame area: there is nothing complicated here. A combination of the left and right basic knot is hidden under the left tatting.
It is tied as follows:
- the first is a simple left knot, after which the working thread will be on the right side;
- with the same thread we tie a simple right knot, swapping the threads.
It is thanks to the direction of the working thread that such a symbolic designation of the knot appeared: the arrow falls to the right, but then changes direction to the opposite.
Right tatting knot
The technique of this knot is absolutely a mirror image of the previous one.
First we knit the right loop with the working thread on the right, and then the left one. The thread eventually returns to its original side. The same can be seen on the symbolic icon, which in the diagram indicates the corresponding tatting knot.
Try to tie the listed knots: practice will help you choose the right thread tension and weave an even, beautiful material. Additionally, having these knots, you will familiarize yourself with the product diagram and learn how to easily and quickly weave baubles even from ordinary threads.
Methods of weaving fenichki
The weaving of baubles itself is the tying of knots of four types. There are two main ways of weaving baubles: diagonal and straight. Among them, you can find interesting solutions for a drawing or pattern, which will differ not only in complexity, but also in the technique of execution.

Those who have sufficient experience can even combine these two weaving methods, creating new original patterns, color mixes.
Braid weaving
The braid can be both the main type of weaving and the design of the edge of the bauble. You can use an even and odd number of threads.
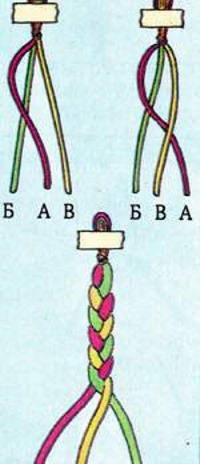
This is a difficult weaving at first glance; for beginners it is better to do it by comparing the work with the diagram below.
Diagonal weaving of fenichki
The simplest weaving is diagonal. The most important thing here is to learn 2 main knots: the knot on the right and the knot on the left.

In the photo: knot to the right, knot to the left, knots with fringe.
This is what they look like. As you can see, there is nothing particularly complicated about them. With these knots you can make a floss bracelet according to any scheme. How to read the diagrams? Very simple.

Lines are threads. You can take any color of threads, but it is desirable that it be dark or light, similar to the original. Circles are the knots between the threads that you will be making. The letters at the top indicate the color of the thread. In the first row there are 6 knots: 3 on the right, 3 on the left. We learned these knots above. In the second row, 5 knots. Thread B is settled, 4 knots to the right, 1 to the left. The last thread B is on the side. Third row: then we work the same as the scheme.
If the diagram shows a „broken arrow” – it is a frizz knot (see picture). We add at the end of the scheme – we start over.
Timeless classics
In this technique there are different ways of weaving, but we will consider the most popular and common, which a beginner can easily master.

Usually bright threads are chosen for the „eternal classics”. We suggest starting with three contrasting colors: red, white and black. You will need two threads of each of them about 100 cm long. The weaving process is as follows:
Step 1. Pull all the threads into one bundle, tying their ends in a simple knot. Braid a braid and fix the future canvas so that it is convenient to work with it.
Step 2. The beginning of weaving always starts from the left thread. Now on our left side there is a red thread, which also works. We tie a simple knot on the second red thread, and then another one on the same thread. The second one is needed so that the bracelet does not curl.

We pass the rest with the same thread, tying double knots on each of them. As a result, on the left and right sides we will have one red thread.
Step 3. The next row starts from the left thread – now it is the second red one. The principle is the same: we tie two knots on all the threads located to the right of the working one;

Step 4. Now on the left side there is a white thread. With each new row, the working threads will go to the right. Weaving proceeds in the same way: as a result, we get a bauble in which two rows of each of the selected colors alternate.

Remember to keep an eye on the thread tension: it should be even so that the weave looks neat.
Step 5. When the bracelet reaches the desired length, separate the threads and braid the same braid as at the beginning: usually 5 cm is enough to calmly put the bracelet on your hand. Tie the braid in a knot and trim the tails. The fenichka is ready!
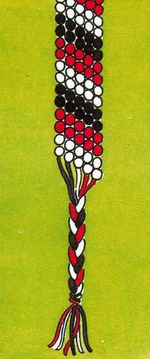
If the description seemed too complicated for you, we have prepared a video for you that shows the whole process.
Simple woven fenichki
The straight weave is usually used to create patterns, words or names. At the same time, two colors of threads are selected – one weaves the background, the other a word or drawing. The straight line is considered much more difficult than the diagonal. But on the other hand, you can find a huge number of all kinds of weaving patterns: patterns with names, colors, pictures and so on.
This weaving takes place, unlike the diagonal one, horizontally. You have to go from right to left, and in the next row – from left to right. It is easier to start learning with 2 colors. The background and the leading thread from which the knots are made. To get a beautiful background – fold the thread 2 times. Knit the knots on the background thread. After reaching the end of the row, move on to the second row. We work in the opposite direction.


The video shows how to weave baubles with names:
Weave a fenichka with a name in a simple way
Each inscription on the bracelet, including the name, is woven in a simple way. Before starting work, you must draw up a diagram with the selected name, drawing it in two colors. The first of them is the background, the squares of the diagram represent knots of the main color. The second is the inscription itself (for example, your initials or a friend’s name). This separation is required so as not to get lost in the drawing and easily understand where to change the thread. Let’s start!

The step-by-step weaving instructions are as follows:
- choose two contrasting shades: in our example, blue is the background, and brown is the inscription;
- we cut the threads from the yarn, creating the same length, fasten to the base;
- place the threads so that the brown ones are in the middle;
- weaving starts from left to right, in simple knots: this is how you need to make several rows, creating a single-color part of the bauble;
- to make it easier to work according to the scheme, turn it so that the inscription is vertical;
- attention: all the knots of the pattern are made in reverse, like the main weave pattern, so that the inscription is in a different color than the background;
- we follow the scheme, alternating different colors of threads;
- at the end of the drawing, we weave a few more monophonic rows, ending the bauble.
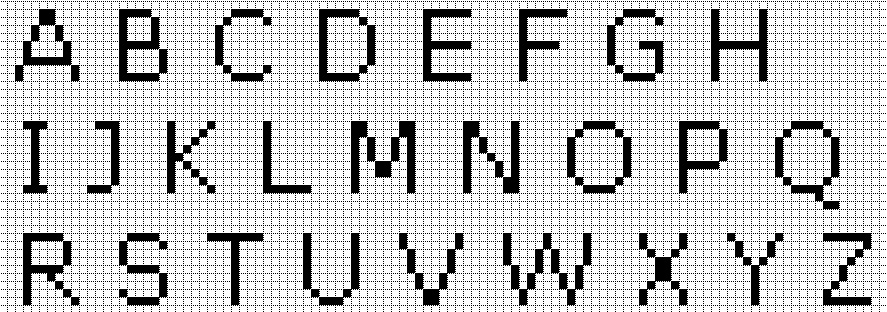
At the end, it is enough to make cords and cut off the excess threads. You can download the alphabet diagrams by clicking on the picture below (English and Russian alphabets, letters by cells).


We also recommend watching the attached video tutorial from Fenkoplet: it very clearly shows the two-color weaving technique.
Simple weave with pointed arrows
To do the job, take an even number of threads of the same length and fasten them at the base.


In this case, the bauble will consist of 12 strands:
- Start working from left to right. With the leftmost thread, which is the working one, start braiding the first 5 threads using the „Simple knot” technique.
- Go to the center of the work and stop.
- Then take the rightmost thread on the right side, now it will be the working one, and start braiding the next 5 main threads on the right side, using the „reverse knot” technique.
- After reaching the middle, weave the right working thread and the left thread together using the „Simple knot” technique.
- Repeat the process starting from the left, reaching the middle, then from the right.
- In the middle, where the working threads meet, alternate „simple knot” and „reverse knot”.
- Decorate the cords, cut off the excess threads.
Basic kumihimo weaving patterns
Kumihimo baubles are voluminous, flat, square, hollow and so on. Each of them needs a special machine, but the main and most popular is weaving thick (round) and flat cords. According to the weaving technique, they do not differ much from each other, so those who master one of the techniques will easily cope with the other. Below are simple patterns for weaving kumihimo.
Round kumihimo pattern
Round kumihimo looks like an ordinary braided cord, it is created in a circle on a round loom or disk. To learn how to weave a bauble in this way, it is enough to take 2 colors of threads and calculate the size. 50 cm = 10 cm of finished work plus about 10 cm for cords.

Kumihimo – baubles: weaving patterns (photo of round kumihimo)
Next, weaving with 6 threads is described:
- Measure the required length of threads and tie them in a knot, leaving 10 cm.
- Place the edge in the middle of the inner circle.
- Spread the threads 2 to the north, 2 to the south, 2 to the west and 2 to the east, pull the threads.
- Take the upper left thread and place it in the slot of the disk to the right of the right southern thread.
- Move the left southern thread to the right of the right northern thread.
- Turn the disc counterclockwise.
- Repeat the steps to transfer the threads to the west and east, which are now north and south.
- Continue moving the threads in this order, turning the disc counterclockwise.
The initial arrangement of colors is marked on the round kumihimo diagrams. The weaving process is always the same.
Flat kumihimo pattern
For flat kumihimo you need a square machine. It is the same as the round one, with a hole in the middle and slits on the sides, only in the shape of a square. You can also create it from cardboard.

In the case of a square braid, you must take an odd number of threads, for example 13 pieces:
- Place 6 threads in the slots on the northern part of the machine, 5 threads on the southern one, and 1 each on the west and east.
- Move the leftmost thread from the top to the free space down on the left side.
- In the lower part, take the left thread (which was originally the last one, and now has become the second one) and place it in the empty hole in the upper left corner.
- Take 2 threads from the top and place them in the empty slot at the bottom.
- Continue to the end of the top and bottom rows.
- Swap the east and west threads.
- Turn the machine counterclockwise, repeat the process.
The square kumihimo pattern also shows the colors of the threads. Above, a trial version with 2 colors was considered; then you can mark on the machine itself the colors corresponding to the threads, for the convenience of weaving.
Mesh

Fenichka „Braid” consists of 16 threads and is made on a round loom (disk).
In the case of 16 threads, which consist of 4 different colors, you need to measure the desired length.
The bauble scheme looks like this (if you imagine that the disk is a dial):
- 2 threads at 12 o’clock and 2 threads at 6 o’clock in the same color,
- 2 threads at 9 o’clock and 2 threads at 3 o’clock in the same color,
- 2 threads at 2 o’clock and 2 threads at 8 o’clock in the same color,
- 2 threads at 11 o’clock and 2 threads at 5 o’clock in the same color.
Start weaving:
- Move the right thread from top to bottom, to the right of the right outermost thread.
- Move the bottom left thread up to the left of the leftmost thread at the top.
- Turn the disc counterclockwise and repeat the procedure with the next 4 threads.
So the output is a cord with 4 colors twisted in a circle.
Flower
A cord decorated with flowers along its entire length consists of 3 colors and 16 strands. First you need to measure the required length of threads, tie them at the end into a knot and place the end in the hole of the disk inside.

For work, take 9 black threads – this is the main color, 6 red threads are the flowers and 1 green thread. The arrangement of colors should be according to the diagram in Figure 1. Start weaving with the round kumihimo technique.
Snake
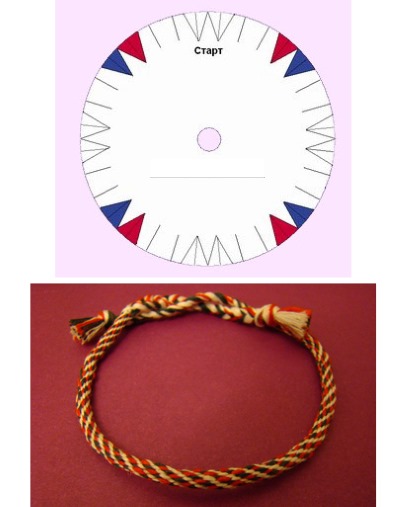
The snake is also woven from 16 threads, of which 6 are white, 4 red and 4 blue. Measure the required length, about 5:1, leave 10 cm for ties.
Take a disk with 32 numbers marked (32 is the top peak, 16 is the bottom peak, 24 is the peak of the left side, 8 is the peak of the right side).
Lay out the threads in the following order:
- white threads on numbers 23, 24, 7, 8, 31, 32, 15, 16;
- red threads on numbers 28, 11, 21, 4;
- blue threads on numbers 27, 10, 20, 3.
Start weaving with the round kumihimo technique, turning the disc counterclockwise.
Hearts
Hearts are made of 2 colors, 16 threads thick, of which 3 are pink, the rest are black. At the beginning of work, measure 80 cm of threads, tie them in a knot at the very end and place them in the middle of the kumihimo disk with the illustrated numbers from 1 to 32. Braid the cord in a circle using the round or volumetric kumihimo technique.

The layout of the thread colors should look like this:
- 3 pink threads for numbers 23, 24, 27.
- 13 black threads on numbers 3, 4, 8, 9, 12, 13, 16, 17, 20, 21, 28, 31, 32.
Diamonds

The 16-weave bracelet contains only 2 colors, red and yellow. 4 slots are occupied by the yellow color, the rest are red.
Before starting weaving, you should accurately calculate the size of the threads to be measured.
To do this, measure the length of the wrist and multiply this number 5 times.
This length is the initial length of the threads, which should be tied in a loose knot at the very beginning, all together.
The next step is to spread the threads in the right places on the kumihimo weaving disk.
The holes on the disk should be marked with numbers or colors.
The location of the colors should be assigned to the following numbers:
- yellow on numbers 12, 13, 31, 32;
- red on numbers 3, 4, 8, 9, 16, 17, 20, 21, 24, 25, 28, 29.
Start weaving the package, turning the disc counterclockwise after each movement of the opposite 2 threads.
Video about weaving fenichki
Popular baubles – weaving patterns + photos:
How to decorate fenichki?
The bauble itself is a characteristic accessory, but this does not mean that the bracelet should be made exclusively of floss. It can be supplemented with various decorations. The simplest way to decorate baubles is with interesting clasps. They can be bought in craft stores. It can be an infinity sign, chain links, a lighthouse and more. And in the bracelet itself you can weave beads, spikes, beads, stones, sequins, rhinestones.


To decorate a bauble with beads or seed beads, you need to string them on a thread and sew them to the bracelet with a needle.

Decoration in the form of rhinestones looks interesting. They can be glued to the finished bauble, but in this case there is a risk that the glue will leave traces. Therefore, you can buy a thread with ready-made small rhinestones applied.
So, to attach a thread with rhinestones, you must do the following:
- In the middle along the thread baubles, you need to lay a thread with rhinestones of the appropriate length.
- Then, with a thread whose color matches the bauble, you need to start sewing on the thread with rhinestones.
- To do this, you need to make stitches using a needle that will run perpendicular to the thread with crystals.

To decorate a bauble with spikes, you need to get special fasteners. But before that, it is better to make markings for decoration. Then, using a needle, the spikes are applied to the bracelet, and fastened from the wrong side.
