
Simple products
The easiest way to make flowers is from colored paper – it can be corrugated or plain, and if you plan to make strictly decorative flowers, you can take paper with a pearlescent or metallic effect. Do not make a tulip or a rose as your first experiment – start with something very, very simple.
DIY schemes and templates for creating paper flowers
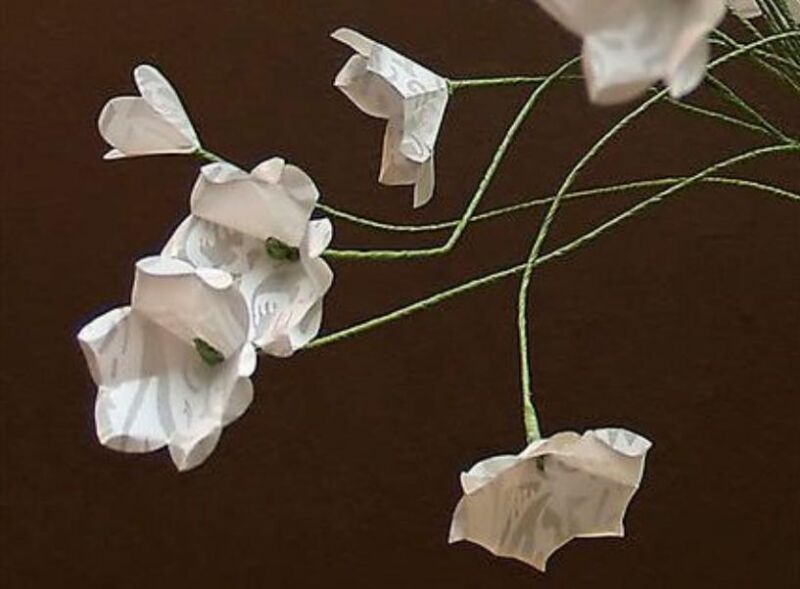
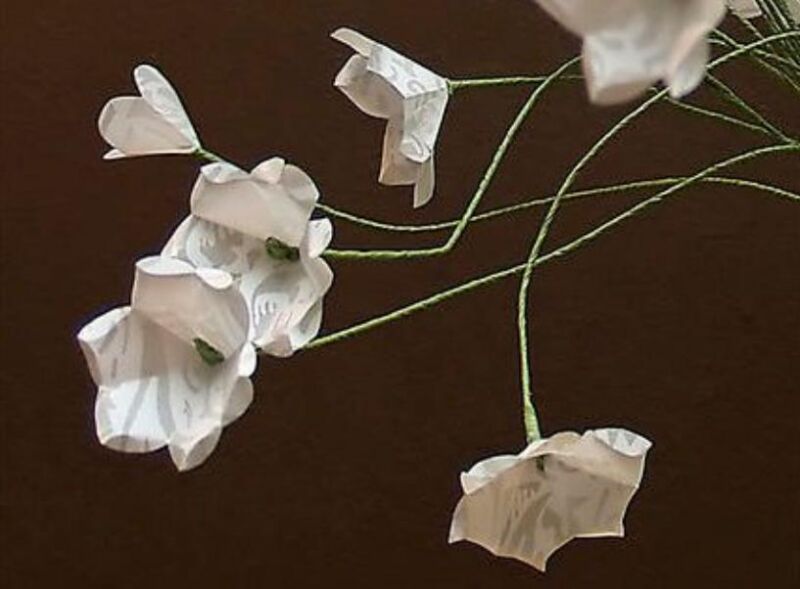
Let’s start by creating such delicate flowers. Even if you simply place them in a vase, you will get a great addition to any interior. One that doesn’t need to be cared for!
You will need: thick paper; scissors; wire; green corrugated paper for the stem; glue.
Production process:
1. Cut a circle out of paper and fold it into thirds. Round the wide part of the resulting workpiece with scissors.

2. Expansion. Cut off the part marked with a dotted line and glue the workpiece.

3. Now we make the stem. To do this, take the wire and bend one end in the form of a hook. We paste it with green paper – it turns out to be a core.

4. Insert the wire into the middle of the paper flower. And then we glue it with a strip of green corrugated paper.

5. Again, fix the lower part of the product with glue so that it does not „slide off” the wire. If you want, you can give the stem any shape.

This is the beauty of this master class.
I draw your attention to several diagrams that will show you how to make the prettiest products.

I think it won’t be difficult to understand them!


A very simple idea. Suitable for lessons for children.
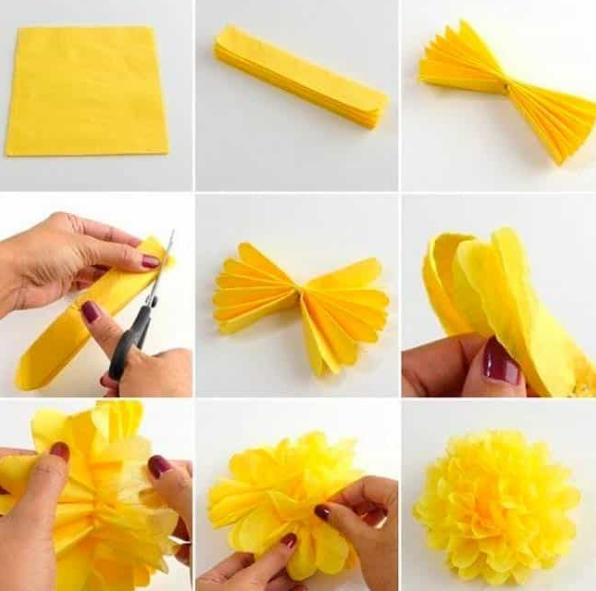
In general, I advise you to consider it.

How to make paper flowers with your own hands

To make simple and effective flowers, you will need:
- double-sided colored paper (corrugated paper is also suitable);
- thin wire;
- sharp scissors and a pencil for marking.
It is better to take colored paper of several shades so that your flowers look spectacular and attractive – for example, it can be shades of yellow or several tones of red. Do not try to mix cold and warm colors if you have doubts about your taste.
For beginners, it is easiest to do the following: fold colored paper several times to get a stack of squares of about 6 * 6. Then with a pencil mark on the top square the shape of the future buds – it can be a smooth rounded shape, regular circles or in general what your imagination suggests.
Next, with scissors, carefully cut the stack in the shape of the marked area and lay it out into elements – each flower needs three to five blanks. The wire should be cut into pieces about 15-25 centimeters long, twisted on one side so as to obtain a decorative center, then the previously obtained „petals” are put on each wire, after which a wire stand is made in the lower part (a stable ring is twisted).
You can decorate the table for the holidays with such crafts or use them for a photo shoot or interior design, or simply attach them to the wall in the kindergarten or in the hallway by the mirror – a good mood is guaranteed.
Or here is a simple option:


Spiral paper flowers

Create simple and cute spiral flowers from paper to make a unique {and inexpensive!} wedding bouquet, table decoration, boutonniere and more. This beauty can be made using paper, a glue gun and floral wire. Cut a circle out of paper. Starting from the outer edge, cut a spiral towards the center. Starting from the outside, roll the paper tightly, moving towards the center. Add some hot glue to secure the bud. Cut out a sheet of paper, fold an accordion in the middle of the sheet and secure with hot glue. Bend the end of the wire at the bottom with pliers and glue the sheet.
Aster is a beautiful lush flower
Appropriate decorations may be required to decorate any event. Often these are flowers with which a room is decorated. You can make such decorative elements with your own hands. This master class shows the creation of a lush flower that can be of different sizes.

To make such a flower out of paper, you need to take:
- several colored sheets (depending on the estimated size of the finished piece);
- scissors;
- a ruler;
- a pencil;
- glue.
Cut out several squares of different sizes. In our case, the largest is a square with a side of 13 cm, and the smallest is 6 cm.
Each of the cut squares will later be a layer of petals. We start making the flower from the largest square, fold it in half.
Next, we make another fold in the transverse direction.
Now fold the resulting square diagonally.
Finally, make another fold by folding the workpiece in half.
With scissors, cut the edge in a semicircle.
Unfold our workpiece.
Cut with scissors between the petals, not reaching the middle.
We make folds on each petal with our fingers – this will add volume to our flower.
We do the same with the rest of the blank petals.
We begin to connect them with glue. To do this, on top of the largest one we apply a circle of smaller petals.
In this way we connect all the petals.
For the center of the flower, you need to cut a strip about 2.5 cm wide and fold it in half lengthwise. Then, using scissors, make cuts along one edge with scissors, not reaching the other edge.
Then we start twisting the strip, periodically fixing it with glue.
In this way we created the center of the flower.
We glue it in the middle of the flower.
Our lush paper flower is ready.
Paper water lily
A very cute and delicate craft.
Moderately difficult, requires accuracy and patience rather than special skills. A real find for those who like to wield scissors.
For the craft we need:
- green cardboard;
- a blue single-sided sheet;
- yellow double-sided (just a little);
- a white A4 sheet;
- a checkered notebook sheet;
- a green marker;
- a pencil and an eraser;
- a ruler;
- scissors;
- glue.
Shall we begin? We take a notebook sheet and draw on it a water lily leaf measuring about 14×12.5 cm. If you can draw, you can skip this „intermediate” stage and draw directly on the cardboard. If not, no problem. We choose a picture of a suitable size on the Internet (request: “water lily leaf coloring, drawing or photo”), put a notebook sheet on the screen and carefully trace it.
Cut out the workpiece.
We place it on the back of the green cardboard and trace it.
Cut it out.
We take the blue sheet and cut off the corners, turning the rectangular sheet into an oval (an ideal shape is not required, so you can cut it by eye). We glue the lily leaf as shown in the photo.
We cut the wave strips, stopping a few millimeters from the leaf. Do not make them too thin – you will be tormented by fraying + they will easily come off from an unsuccessful movement. The width shown in the photo is minimal. You can make the strips much thicker, the craft will not suffer from this.
Curl the waves with scissors – the scissor blade is on the white side, the thumb on the blue side.
Now let’s decorate our leaf with a natural pattern. Sketch the drawing with a pencil and paint it. For coloring I chose a felt-tip pen. Its main drawback is that it smudges perfectly (it also depends on the texture) until it dries. When coloring, try not to touch the already „past” areas with your hands. If you are left-handed, paint from right to left, if you are right-handed – vice versa.
While our handsome leaf is drying, let’s take care of the main „decoration” of the paper craft – the lily. To do this, take a white A4 sheet, fold it in half 2 times and tear / cut it. We will have four identical rectangles.
We take one of them and fold it 2 times. Using a ruler and a pencil, draw a petal 5 cm long (along the fold line).
We cut out, remove pencil marks, lay out and bend the petals (more precisely 2 of them) so that they are all „open” in one direction.
Making another 5 cm and two 4 cm flowers.
We glue the flowers.
Now you need to make the core of the lily. For this we need a small piece of yellow double-sided sheet. We tear it into small pieces and crush balls from them (in the end it took me only 3).
We glue them to the center of the flower.
We are home! It remains only to take the lily and glue it to the sheet. Try to press only in the middle so as not to damage the volume of petals and waves. Done!
DIY large decorative flowers from office paper
Crepe paper poppies
In this master class we will make such bright and beautiful poppies.
Materials and tools:
- green and red corrugated or crepe paper;
- black threads;
- wire;
- scissors;
- a glue gun with glue sticks.
From the red roll, cut off a wide strip.
Next, on a piece of cardboard, we draw a poppy petal pattern and cut it out.
We apply it to a strip of crepe and cut out the petals along the contour.
Without unfolding the petals, we stretch their middle part, creating a depression.
From black threads we create poppy stamens. We wind 20-25 turns of thread on the index and middle fingers. We tie the coils in the middle or clamp them with a thin wire. Remove the resulting bow from your fingers and cut off the ends of the loops.
Roll the center of the poppy from a green segment. Then we wrap the ball with a piece of black thread. The intersection of the coils is fixed with a drop of hot glue.
Now we glue the ball to the bunch of stamens and evenly distribute the ends around the post. The poppy core is ready.
We glue six petals to its bottom.
The first crepe flower bud is ready!
From the wire we form the stems and wrap them tightly with a green crepe strip. We make leaves from the same color.
Origami tulips
Tulips are an unconditional symbol of spring and are the favorite flowers of many women. Fortunately, in our time, tulips can be bought all year round. And some men are ready to present fresh cut flowers to their loved ones every day. But why throw so much money down the drain??
To have tulips in your home all year round, make them yourself. Very beautiful flowers are obtained with the origami technique.
The following materials are needed for work:
- double-sided sheets in bright colors;
- a long wooden skewer;
- scissors;
- a tube of PVA glue.
We take a sheet in a bright color, always double-sided. For example, a lilac shade.
We turn the corner to the opposite side and cut off the excess part.
You get a square (rhombus).
We fold it into a triangle again.
Unfold to the starting position.
Fold in half to make a rectangle.
Hide the corners in the middle.
It turns out to be such a small triangle. We place it with a charge.
Bend the bottom corners up. First to the left, then to the right.
Then we turn the workpiece to the other side and repeat the manipulations again.
We open the resulting figure so that the folds are in the middle.
At the bottom we place the corner that does not open, and at the top it has many corners. Fold the right and left corners towards the center so that they overlap.
We carry out the same process on the back of the workpiece.
We insert these corners into one another on both sides.
Cut off the bottom corner.
Holding the joints on both sides with our fingers, we blow air into our flower.
It is now voluminous.
It remains only to bend the upper corners.
Here is the tulip bud.
Cut an oval leaf from a green sheet.
From a thin green strip and a wooden skewer we create a flower stem.
We glue PVA and glue a leaflet on it.
And on top we fix the flower.
The tulip is ready!
Other options on our site – how to make origami flowers with step-by-step photos.
3D origami flower
Origami iris
Origami Lotus
Banknote flower
Carnation flowers from paper modules
In this master class we will make a very simple but lush and beautiful carnation. It can be used for making holiday cards.
To make a carnation, you will need:
- colored sheets in red and green;
- scissors;
- klej;
- a ruler;
- a simple pencil.
Such flowers are made very simply and quickly, thanks to which many carnations can be made in a short time. It is advisable to use red or pink colors.
First we need to add 12 identical modules. To do this, cut out 12 identical squares. In this case, their size is 5 by 5 cm, but you can cut absolutely any squares. The larger the square, the larger the finished carnation will be.
Cut out 12 red squares and 1 square exactly the same, only green. It is necessary to form a plot from the bottom of the flower.
We take 1 square. We begin to fold the module. The most important thing is to remember only 1 time, all subsequent parts are folded in the same way.
We will have to bend the square 3 times. First, bend it diagonally to form a triangle.
Then we fold it 1 more time. We get a smaller triangle.
Now it is important to correctly position the part. We rotate it so that the opening sides look to the left. Take the right upper side and fold it back.
This completes 1 detail! It is very important that the last tab is on the right side. Otherwise, we simply will not be able to assemble the flower. So you need to make 11 more exactly the same red details and 1 green one.
Now let’s start assembling paper flowers. We take 1 piece and open it, slightly bending the right side back. This is the side that we folded at the end of each detail.
Now we need to insert the back into the left side of the second module. A pocket is formed from the first tab.
You can lightly grease the side with glue so that the parts hold better. And bend the right side of the first part back.
Next, we continue to collect flowers. Let’s connect a total of 6 modules.
Let’s put the workpiece aside. Next, in exactly the same way, we will assemble 4 modules. They must be glued to the first piece from below.
We will have only 2 red modules left. We collect them and glue them on top of the part of 4 modules from the bottom.
Now we take the green modules and glue their sides so that they do not bulge. We glue the details from below. This is the sepal.
The paper carnation flower is ready!
Flowering cactus from napkins
The flowering cactus is extremely beautiful! But because of the prickly needles, few people grow cacti, and their flowering is only seen in photos. Let’s make a cactus that is both safe and very beautiful!
We will need:
- Scissors;
- PVA glue and pencil glue;
- A small round jar or container (for a pot);
- Napkins (green, yellow / orange / red – for the flower, burgundy or brown – for the soil;
- A stapler;
- Decorative tape;
- A small long box (from perfumes or medicines).
Let’s start „growing” the cactus! First, let’s decorate the pot – attach a decorative ribbon to the jar. You can wrap it once or twice at your own discretion.
Now take the green napkins and cut them into 4 pieces. You can cut several napkins at once.
Next, you need to separate all the small squares and crush each one. This will be the base for the cactus.
We move on to the „growing” greenery on the trunk. We take the box and apply glue to it with a glue stick.
And then glue the resulting „leaves” from all sides. You need to glue tightly so that there is no gap. At the top we leave a free space – here there will be a paper flower. Here is such a „cactus”!
Cactus flowers are very bright and lush. Take 2-3 colored napkins and connect them in the center with a stapler crosswise. Draw a circle and cut it out.
Now start crumpling the edges of the napkins towards the center, starting from the topmost circle. You should get such a lush flower!
We glue the flower to the place that we left empty on the trunk.
From dark-colored napkins we make blanks for the soil, just as we did for the greenery.
Apply glue to the bottom of the pot, especially in the middle. First we glue the cactus, and then the soil around it.
Using a thin brush and white paint, you can mark the needles. Here is such a handsome cactus! Bright and not prickly at all!
Daffodils from egg cartons
Every day we deal with various, at first glance, completely unnecessary things. But if you think well and imagine that these are not easy nonsense, but a future work of art. This is what egg cartons look like.
We buy eggs all the time, but the boxes seem unnecessary and end up in the trash. But it is from them that many interesting things come out.
Here we will now try to make a wonderful picture with beautiful daffodil flowers from them.
To make a picture, you need:
- one cardboard egg tray;
- acrylic or other paints;
- A brush;
- scissors;
- pencil glue and silicone glue;
- a pencil;
- a colored green sheet.
So let’s get started. Take an egg tray and cut it into two cells.
Now we cut out the petals from each cell. As shown in the photos.
Four petals will come out of one such mold. From a whole box of ten eggs there will be eight flowers. But you don’t have to cut everything, you can make five flowers.
In addition to the petals, you need to cut out as many small circles as there will be flowers. The petals will be glued to them. Also cut out five small petals. They can be easily cut from the leftovers of the box.
For flowers, stamens are also needed. They can also be cut from the leftovers. And cut with scissors into small strips. And also the core. For this, you can cut off the top of the cell. And bend the edges with your hands so that the paper flower looks more like the original.
After cutting out all the details, they need to be glued. Glue six petals on a small circle in a circle. A real daffodil has the same number.
Then we glue the center of the flower and insert the stamen into the middle. And let the flowers dry well. The drying time will depend on the glue used.
The finished flowers are painted with acrylics. They can be painted in any shade, but so that they look like flowers.
While the colorful flowers are drying, you need to cut out green leaves and grass. Approximately, as shown in the photo.
Then glue a few small petals on the grass below and paint them with green paint. Glue the finished flowers onto the picture.
So the spring picture with paper daffodils is ready.
Chamomile from corrugated cardboard
In this master class we will make delicate chamomile flowers.
Let’s start from the center of the flower – cut out a square of 7cm by 7cm. We make a blank of cotton wool and wrap it, giving it the shape of a pyramid. We connect.
Apply light yellow flock powder to the flat part.
Cut out a rectangle for the chamomile petals – 8cm by 18cm.
We wrap the middle in it, as shown in the photo.
Bend the edges.
And we begin to cut out neat petals with small scissors.
Our delicate chamomile is ready.
DIY sunflower
In the same way, sunflowers are made from crepe paper.
The only difference is the middle. We made it from dome-shaped candies.
And for decoration, they did not use flock powder, but a silver mesh.
In this way, bright sunflower flowers are created quickly and easily.
The flowers are very realistic and beautiful.
Anemone
Cornflower
Iris
Iris flowers
Bells
Thistle flower
Daffodil
Peonies
Buttercup
See here step-by-step master classes – flowers from crepe paper.
All these paper flowers are beautiful, well, so beautiful that you can leave them at home, or even display them in some vase with other, more organic elements. As usual, follow the instructions described in our instructions, and in the blink of an eye you will get beautiful paper flowers.
DIY origami rose from paper
Try to make Kawasaki paper origami, named after its creator, Toshikazu Kawasaki. It is quite a complex model, but if you already have experience with origami, you can try. By the way, a simplified version is presented here, because there are models that only origami gurus can make. In the gallery photo, the fold images are marked with dotted lines and arrows, and each folded one is marked with a letter. So you can use the instructions on the site with a description of each stage.
Simple origami paper flower

If you have no experience, but want to make an origami flower with your own hands, here is a good example. It may not be the easiest paper flower, but simple enough for a beginner. You can read the instructions on the website or here is a short version. First fold the paper in half. Fold one corner down and connect with the other end. Do the same on the other side. They should look like two little ladies. Then fold the side folds to the center, open and fold into squares. Repeat the same step on the other side. Then make a triangle (as shown in the photo) and press, then flip. Now fold 2 squares, squeeze and twist. To create the petals, fold the sides, lightly and turn to give shape to the flower! Probably a little confused, it’s easier to look at the step-by-step photos, they are below in the gallery.

Kusudama origami flowers

Kusudama is a Japanese paper folding technique that is practiced to make light and beautiful flowers out of paper. You can use them as a wedding bouquet or an idea for a school project or as an element of home decor. If you want to make these beautiful kusudama flowers, you don’t need to buy any special materials – glue and scissors, here are your tools. The materials you will need are ordinary colored paper, corrugated cardboard, wire and ribbon – a common craft set for making paper flowers.

Forget-me-not flower from paper

Here are the schemes and instructions for those who want to make a cute forget-me-not flower using the origami technique. First you need to prepare a pentagonal base. If you want to make a five-pointed star or a flower with five petals, you need ordinary paper in the shape of a pentagon instead of a square; how to do this is described below. A special origami technique used to make forget-me-nots is the squash fold. Learn this technique, it will come in handy in many origami models. See the schemes and step-by-step photos below.
Here’s how to make a regular origami pentagon from square paper.

Origami lily of the valley
Instructions for those who want to learn how to fold a lily of the valley from origami paper. The photo below shows how accurately this origami model imitates a real flower.
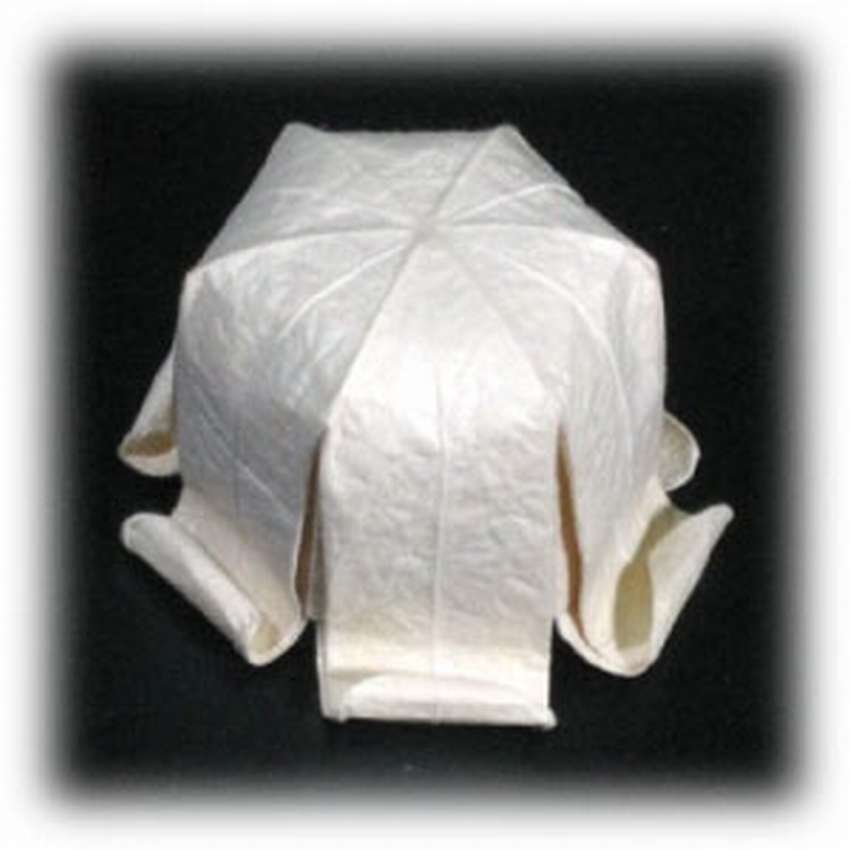

This origami lily of the valley has six petals. The basic origami technique you need to learn from this model is the basic petal fold. It uses paper of the same color on the front and back.
Paper camellia

This paper camellia flower is also made from coffee filters. It is very easy to make such beautiful camellias because they use paper clips, so you don’t have to deal with glue.
What you need:
- Coffee filters (10-15 per flower)
- Scissors
- Paper clips
Check out the step-by-step photos and make sure that this is a very simple craft.
White flowers from coffee filters

Do you still think that coffee filters are no longer suitable for anything other than their intended purpose? In vain. They are slightly stronger than napkins and make wonderful flowers. Here is how to make beautiful white flowers from coffee filters. It is a very simple process, although time-consuming. How to do it is described in detail in the instructions on the site. At one point, when you roll the filters, you need to make sure that the top of the paper is full and even, unless you want to end up trimming all the edges. See the master class below in the step-by-step photos.
Anemones from white crepe paper
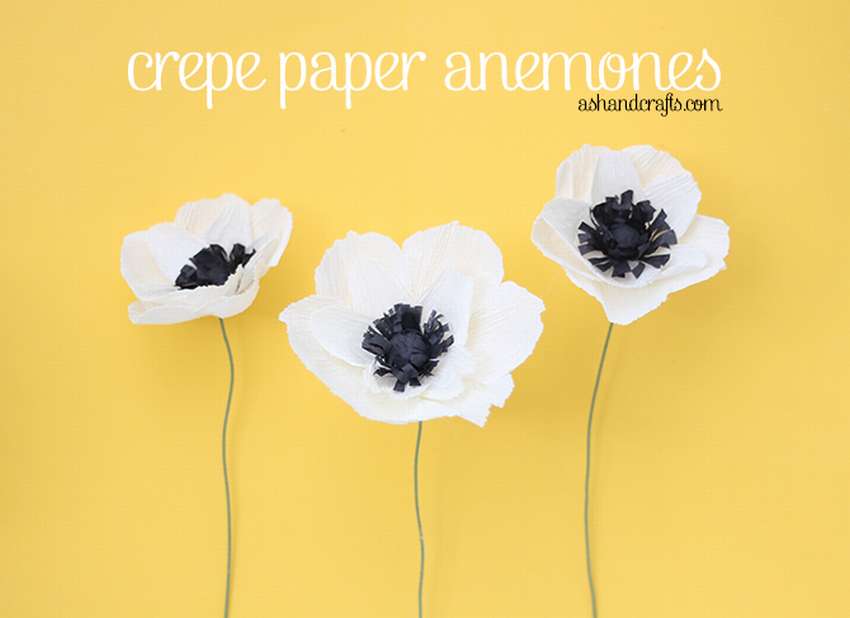
This tutorial is about creating funny anemone flowers from corrugated cardboard. The instructions are very simple. You can even make them with napkins, although crepe paper is better because of its stretchability and bowl shape. You will need to cut white crepe paper into 6 wide strips and 5 thin strips. The fold should run parallel to the length. In this example, the wide strips are about 2.5 x 5 cm and the thin strips are about 1.5 x 5 cm. Cut the strips into a regular ball-shaped petal, but wiggle the scissors at the top of the petal to create an irregular edge. Detailed instructions can be found on the site; below, see the master class in step-by-step photos.
Peony from white paper

To make a voluminous peony from paper, you will need the same materials as for making a dahlia. Use a pencil to roll out the petals on one of the layers of paper. Roll up the top, smaller layers, larger than the larger ones at the bottom. Glue the layers, rotating each so that the layer underneath is not completely covered. You can create many beautiful effects by placing flowers closer or further apart, complementing them with other paper decor. Although only three types of paper flowers are presented here, the amount of colors needed will depend on how large the background is. Two peonies, three dahlias and three apple blossom flowers were used as a background.
Volumetric dahlia made of paper

You will need white paper, a rod, a rounded pencil and a glue gun. For best results, it is recommended to make a dense coating in the center of the paper dahlia. Roll out the petals on the two smallest layers with a thin rod. Also use a pencil to curl each side of the petals on the other layers. Repeat these steps for each layer of paper. Holding it in your hand, lay the petals on top of each other and twist into a tight bud shape. Repeat for all layers and, for convenience, arrange the petals from smallest to largest.

Fold the paper dahlia, starting from the largest layer. Open the bud, leaving the curled edges. Do the same with the next layer and glue them together, rotating each so that the layer below is not completely hidden. As you get closer to the center of the flower, smooth the layers less and less so that the two smallest in the center remain in the shape of a bud.
Paper apple blossom flowers

To get the same effect as in the photo, you will need paper in the appropriate color and a glue gun. Take one of the layers of paper and fold each petal in half about ¾ down the petal. Fold up, press the center of the flower inward so that all the petals stick together a little around it. Your flower is no longer flat! One of the petals on each sheet of paper has a square flap. Glue the petal next to the flap. Repeat these steps for each layer of paper. Glue all the layers of paper, rotating each so that the layer underneath is not completely hidden.
DIY white paper flower: hydrangea

Frankly, many people are afraid to make paper hydrangeas. Although it is one of the most beautiful flowers, the idea of gluing hundreds of small petals into a ball is discouraging. But if you want simple solutions, here is an idea for a 30-wire structure made of florist wire. When everything is ready, everything else is simple! If you don’t have a knife, cutting 60-90 small flowers for each hydrangea head will take quite a lot of time, but it will be worth it. The most amazing thing about real or paper hydrangeas is that each curved head takes up a lot of space both physically and visually.

Here, 60 petals were used for smaller flowers, that is, two sheets of paper, and 90 petals were cut from three sheets of paper for the larger one. Each flower has three glued-together leaves under the base of the dome. You can add more leaves to individual wire stems if you want to add greenery to the bouquet. 30 cm flower wire was used for the stems. You need 30 wire stems for both sizes of flowers. To add some color to the petals, use simple craft paint to add a nice accent. The results will be great, you can be sure. How to make a hydrangea from white paper, see the step-by-step photos below, all the details on the site, link under the gallery.
Flower from white crepe paper: magnolia
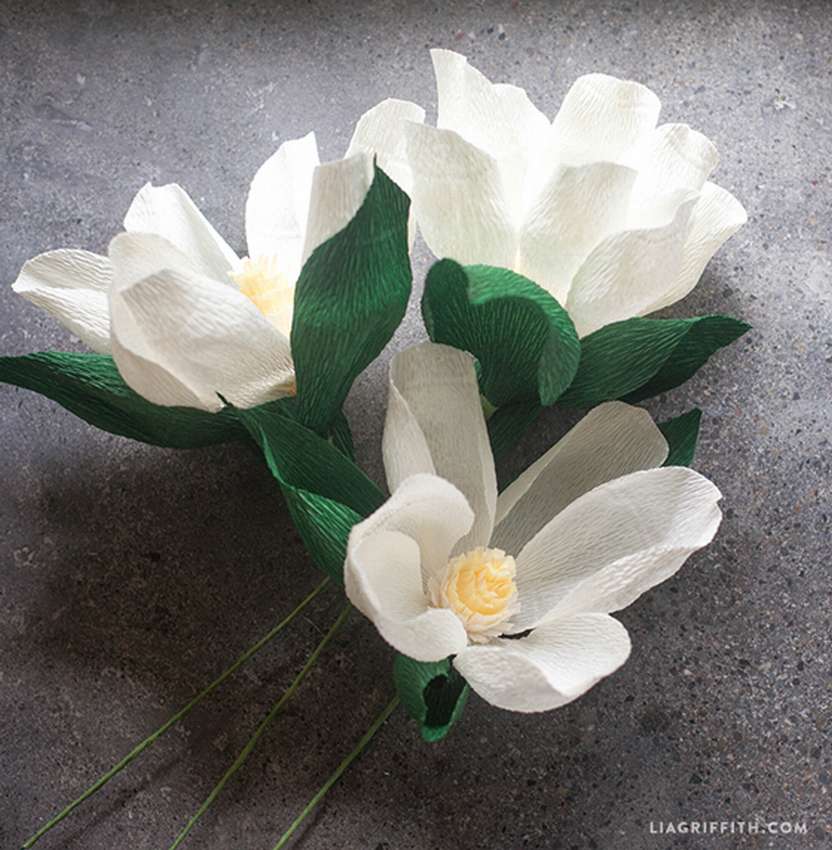
Magnolia is the calmest flower, so when making these beautiful flowers from white paper, we experience a wonderful feeling of calm. This corrugated cardboard version is very easy to make, because crepe paper can be stretched, shaped and manipulated with your fingers to get the right shapes. It turns out simple and elegant; sticking to the delicate white shades of the petals and adding a lot of green leaves to the vase, you get a very beautiful composition.

The flowers are durable enough to hold their shape, yet light and delicate, giving them a wonderfully realistic look. Here’s a step-by-step guide on how to make a white magnolia crepe flower to incorporate this wonderful flower into various arrangements, wreaths and bouquets. On the site, the link to which is under the gallery, you will find all the templates needed for this project. This simple three-flower composition adds two leaf stems in two shades to give the flowers texture and fullness. See the master class below with detailed step-by-step photos.
Crafts from napkins in the form of flowers
And in conclusion, I would also like to demonstrate a very interesting way of making „inanimate” jewelry from ordinary napkins. We watch and do crafts!
Or you can make a lovely rose.
That’s all. I hope that the proposed ideas appealed to you and you have already figured out how you will amaze your loved ones.
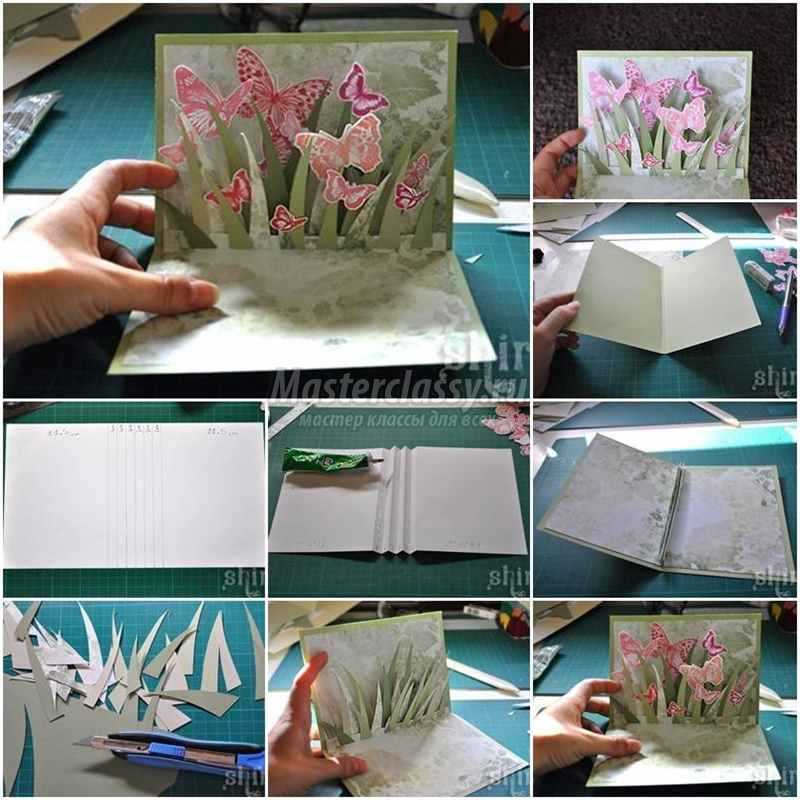
DIY postcard with a volumetric flower inside
But the most interesting thing awaits you ahead! Make a bright and unique postcard with a volumetric flower inside yourself. All the beauty will appear before you only after opening the postcard, because a large volumetric flower will appear in the middle.
To get an original 3D postcard with flowers with your own hands, we need the following set of materials:
- A sheet of cardboard
- Double-sided sheets of paper
- Glue stick
- Markers
- Scissors
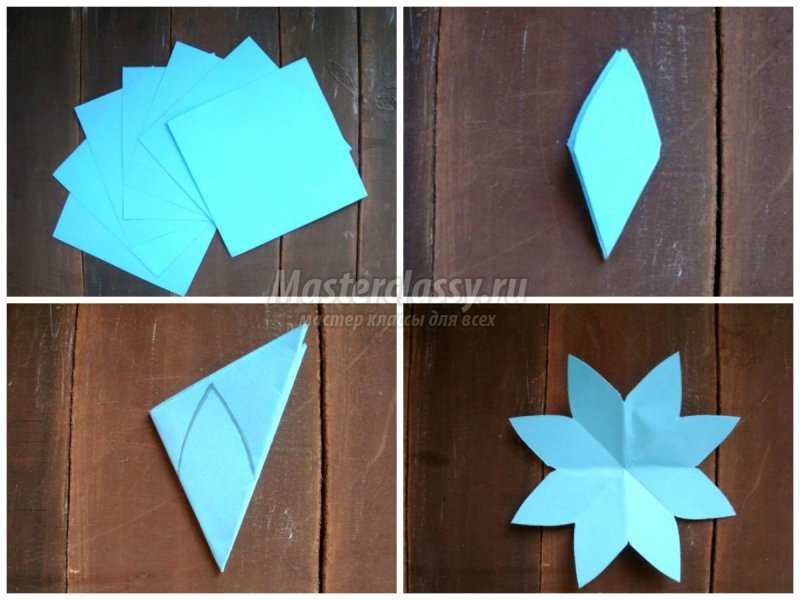
To get a beautiful volumetric flower in the middle, we must correctly make the blanks: in total there will be seven of them. First you need to cut out 7 squares so that the side is 10 cm, and then fold each into a triangle, after which the workpiece is again in half. On the resulting blank triangle, draw a petal, as shown in the master class, and cut it out. When you straighten the workpiece, you will get a beautiful flower with eight petals.
We will decorate the petals in the simplest way: use a felt-tip pen and darken the middle part and the edges of all the petals. When shading, you can leave two adjacent petals blank.

To get a volumetric composition in the middle, each of its elements should turn out voluminous. Using scissors, you need to cut out one petal from each blank, cutting it to the very center, as shown in the figure. The remaining blank petal should be greased with glue and glued to the neighboring one to get a voluminous flower.
A volumetric „do it yourself” card with flowers will turn out clean only if you correctly connect the resulting blanks. They must be glued one on top of the other in layers, gluing only those areas that are marked with a cross in the master class photo:
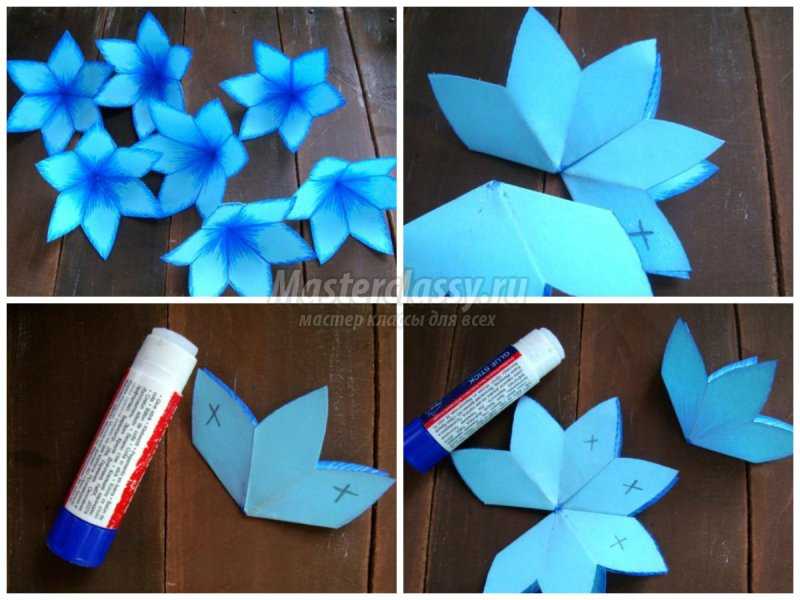

When the inner blank is ready, it should be pasted into a sheet of cardboard folded in half. Now you know exactly how to create a card with flowers inside with your own hands, and if all the steps were performed in the same way as in the master class, then when you open the „book” the flower will unfold.
You can choose your own paper color for each blank to create a 3D card with seven flowers, or experiment with different color options.









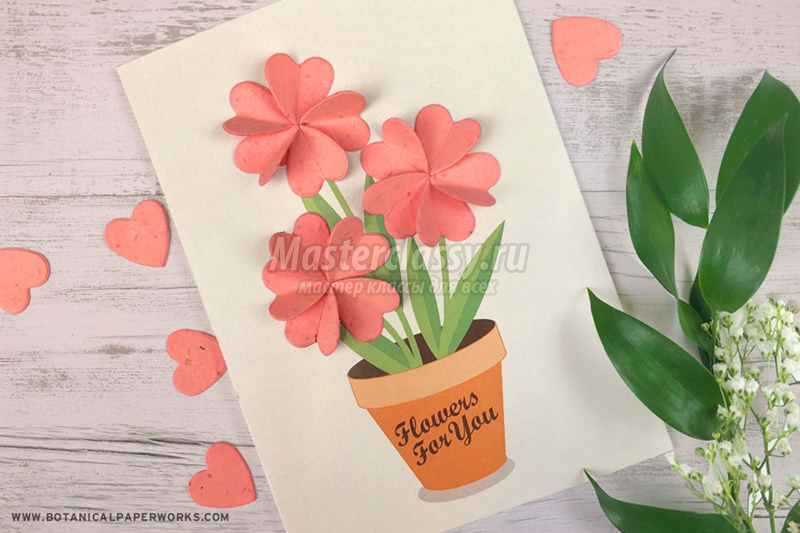


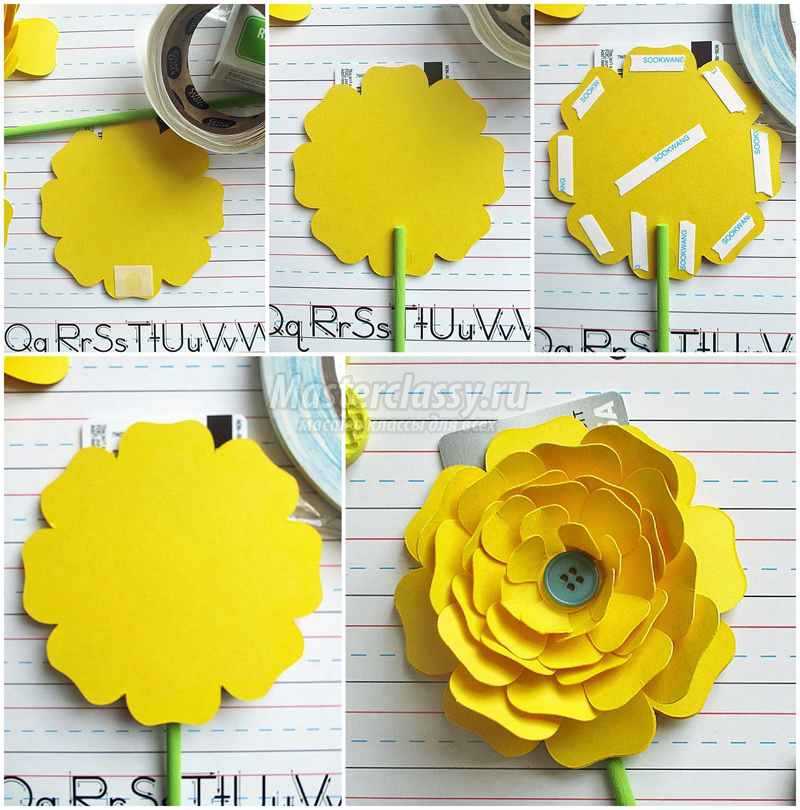

Let’s watch a video on how to make such a flower for decorating a photo zone?
Templates for cutting
This section contains ideas and diagrams that you can use in your creative work. There is an apple blossom template for cutting out of paper, a template with leaves and branches, and other photos of finished works that you can also make yourself.






Homemade things can be an original gift if you try very hard. An apple branch made of crepe paper in a bright design will not leave anyone indifferent and will become a stylish interior decoration.