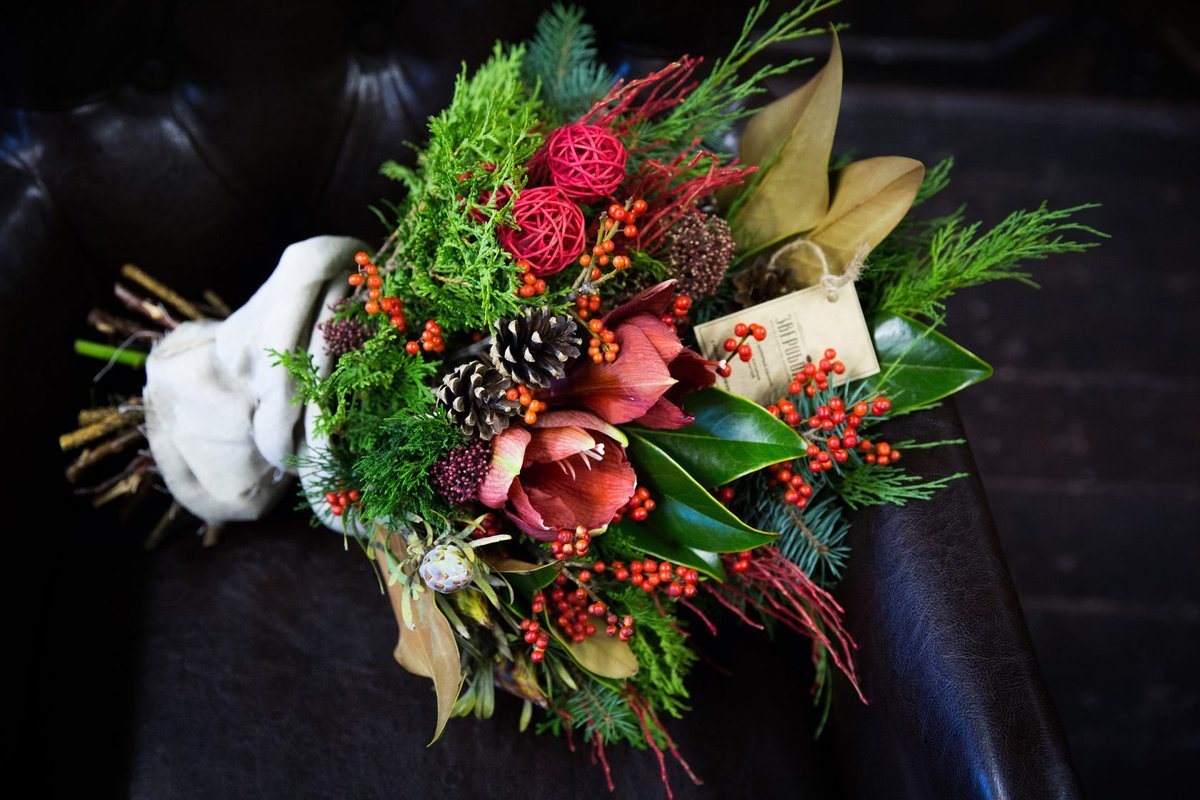
Packaging is an integral part of the bouquet – types and variety
Experienced florists use various auxiliary materials to create their masterpieces. Modern manufacturers produce a huge assortment of packaging for fresh flowers, fruit and food bouquets. To emphasize the beauty of the composition, use the following types of packaging:
- Packages. The simplest and most popular wrapping method. Cellophane perfectly retains moisture, therefore it is ideal for transporting and storing live plants. Such bags are universal, standard cone-shaped, and original, in the form of a glass.
- Paper. Use a simple plain wrap or with a themed pattern, for example, for a gift for a wedding, teacher’s day, children’s party. It can be glossy, iridescent, corrugated.
- Synthetic film. Such packaging gives a complete look to any bouquet. It can be transparent, colored, metallized.
- Napkins. Suitable for packing small bouquets. They can be simple, openwork, multi-colored, of all kinds of shapes and sizes..
- Burlap. Bouquets in retro style are packed in it. It can be simple gray or sparkling, with the addition of lurex.

What is floristry
Floristry is understood as the art of making bouquets..
This is a type of design that results in flower bouquets, panels or collages. This kind of work has both a technical and a creative side. The purpose of floristry is to decorate any holiday or event, to express their theme or idea through natural compositions of flowers and leaves. Novice designers in this area should pay attention to simple collages or bouquets. As a result, such a hobby can become a real profession. Where to start – learn the basics of floristry for beginners.
Basic floristry rules
Composition is an opportunity to create a single ensemble of various floristic components, subordinating them to each other. In this case, both the individual characteristics of plants and the general laws of the balance of textures, structure and color are taken into account..
Materials for floristry
The main material for floristry is various elements of vegetation. These can be live, dry or artificial flowers. All of them are divided into 3 more groups:
- Linear plant material. These are long stems, tall ornamental plants, large leaves.
- The main plant material, or dominant. These include large inflorescences and buds, bright leaves.
- Additional material, or filler. This group includes medium-sized elements – buds or leaves, the function of which is to cover the fasteners.
Along with plant material, there are also floral accessories. Their function is to complement the composition and design of the designer. A variety of details are used as accessories:
- bows;
- tapes;
- candles;
- seashells;
- figurines of animals;
- pebbles;
- bells;
- coasters.
- materials for floristry
Florist tools
Any beginner or anyone who is already seriously interested in floral design will definitely need the tools of a florist. In any composition, it is important to fix all the elements with something. For this, floristic foam is used. Floral pins are used for the same purpose. Only with their help are the ribbons attached, which is necessary for decorating the stem or masking the wire. In addition to these tools, both beginner and experienced florists use the following:
- Pliers and wire cutters. Essential for cutting and wire handling in general.
- Flower pruning shears, garden shears. They must be sharp so that the cut of wood twigs or thick stems is smooth..
- Glue gun with sticks. Used for fixing foam in a vessel and creating bouquets of artificial flowers or dried flowers.
- Stapler. Various small parts can be fastened with brackets.

Floristry secrets
People who are already professional in this business can share a few simple tips with even beginners. How to make the bouquet stay fresh for a long time, correctly combine several varieties of plants, or simply prepare them. Of all these secrets of floristry, the very art of drawing up flower arrangements consists. Here are some of the most interesting for beginners:
- To prolong the freshness of bouquets, it is worth choosing plants that live longer than others. You can also keep them cold and change the water more often – after 1 or 2 days.
- Mandatory rule – there must be an odd number of plants in a bouquet. Even is only suitable for mourning occasions.
- The size depends on the occasion. For a serious celebration, you also need a larger bouquet. Compositions with a diameter of 25-20 cm are considered a universal option..
- It is recommended to form a bouquet from the most voluminous element, which will be the center. The following details are added in a spiral manner. An interesting option is a combination of flowers of different textures, for example, roses and hypericum or red gerbera.
Directions and styles of floristry
Europeans distinguish three directions of floristry: form-linear, vegetative and decorative. This classification was approved by Gregor Lersh and Daniel Ost. Peter Asman outlined 4 directions of floristry. In addition to the three styles listed above, there was one more – parallel.
However, this direction has been moved to the category of the arrangement of lines of plant materials. Currently, creative floristry is especially popular. This direction is characterized by originality of forms, sophistication and uniqueness..
Compositions made in a linear style are very easy to recognize. All plant materials are used sparingly. Any element is very important, as well as the moment of using the space between materials is important..
The peculiarity of the massive style is in its arrangement. These are volumetric shapes with soft transitions. The florist creates the central part of the bouquet, and then gradually fills in the contours of the arrangement.
Compositions made in a mixed style of floristry are very diverse. They are far from the established rules for arranging linear, massive or massive-linear style. Most likely, they harmoniously combine all styles..
Floristry is an exciting activity that will give you a lot of pleasant minutes. By making a composition of flowers, twigs and leaves, you become closer to nature. The study of floristry as a design element can not only provide an opportunity to learn new opportunities, but even develop into a real profession..
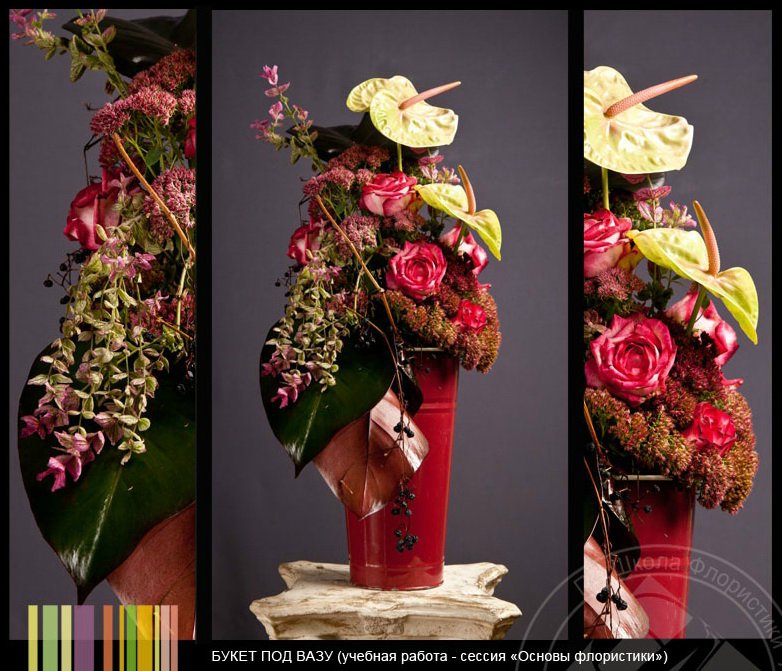


Floristic compositions
When drawing up floristic compositions from roses, lilies, carnations or any other flowers, the main thing for beginners is the observance of proportions. This applies to the proportionality of the vessel and plants, buds, vases and leaves. In general, the composition should be harmonious. The golden ratio also works in floristry. It is as follows:
- If the bouquet is arranged vertically, then 5 out of 8 parts should fall on it, and the remaining 3 on a vase.
- When the composition is stretched more horizontally, i.e. the plants are in a low vase, the shortest branches are 3 parts, and the longest – 5. Or in other words – the long flower is equal to 1.5 times the diameter of the pot.

Bouquets of flowers
To create a truly beautiful and original bouquet, it is not enough to put the plants together and wrap them with the first film that comes along. Floristry is a real science that requires some knowledge of botany, as well as taste, which helps to combine different forms and shades..
Complex compositions are created taking into account the time of disclosure of certain types of plants. They must have excellent durability in order to stay in the apartment for as long as possible. For beginners, it is better to carry out bouquets in the same color scheme, for example, from autumn flowers. After watching the video of the master class on creating a mono composition, you can make an interesting craft from living plants.

The basics of making bouquets of fresh flowers
Floristry for beginners, step by step, suggests that the student should first of all concentrate on unobtrusive compositions. Decorating the bouquet may be unnecessary, and this will negatively affect its attractiveness..
The design of the composition should be based on the purpose for which it is created. Accordingly, it is necessary to use elements that are optimally suitable for this purpose..
Making bouquets of fresh flowers
There are different types of bouquets. The main classification is female and male. In addition, there is a division according to the purpose of the bouquet:
- wedding;
- children;
- mourning;
- daily;
- festive.
Making bouquets of fresh flowers for beginners can be tricky, so it is recommended to use only one type of plant. This makes it easier to deal with the shades, shape and type of bouquets. The main type is massive – there is no space between the elements, and plants are presented in no more than 2-3 varieties. Besides them, there are the following bouquets:
- round;
- boutonnieres;
- free;
- one-sided;
- flower jewelry.
Bouquets may vary in size. Large ones are suitable for a birthday, and small ones for a wedding. In general, the compilation technology for beginners looks like this:
- determination of the shape of the bouquet – the number of plants, their compatibility;
- cut of plants;
- assembly of elements into a bouquet, decoration;
- placement in a vase of water.
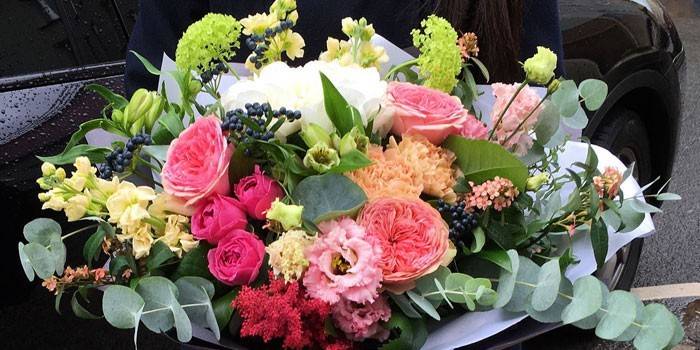
The combination of flowers in a bouquet
One of the essential elements of success for novice florists is the combination of flowers in a bouquet. It is very important to feel which shades complement each other and which simply cannot be used together. In addition to the harmonious combination of colors, you need to choose the right one. Warm shades will enliven the bouquet, while cold shades will make it more restrained. The former include orange, red and yellow, and the latter – blue, green, purple. With the help of a warm scale, you can visually bring the elements closer. Cold shades, on the other hand, remove details..
“Contrast”
The use of plants and elements of opposite color in a bouquet can make the composition bright, saturated, inspiring a sense of optimism..

Contrast that is too sharp, however, can lead to the opposite result..
“Similar”
If the composition contains elements that are similar in color, it can be classified as similar. Additional use of different shades of the same color is allowed.

The number of colors is not limited here, perhaps some will prevail over the rest, and maybe all of them will be presented equally.
“Monochromatic”
By using one color, but playing with its different shades, the result is a monochromatic composition.

The combination of elements in this case is associated with smooth transitions, which involves catching the eye of the “whole picture as a whole”, but if necessary, you can consider each element separately.
“Rainbow”
No particular color restrictions are expected. A variety of colors and other attributes of the elements of the composition can be used. A prime example here is the usual bouquet of wildflowers..

Despite the absence of strict restrictions, it should be understood that there are colors and other details that together do not look the most pleasant way..
Floristry training for beginners, step-by-step master classes
Beginner florists, thanks to master classes, will learn some secrets and get acquainted with the pitfalls that mentors tell how to get around.
Nowadays, schools or simply floristry courses are very popular. They provide a range of services for those wishing to learn this art. A novice florist or professional can visit them. Introductory classes, lectures, master classes and seminars, during which you can not only learn about the design of bouquets, but also try to compose them yourself. Besides special courses, there are other ways to study to be a florist. Beginners can watch online video tutorials or master classes and even read interesting books.

Bouquets in various boxes
A flower arrangement in a box is not only convenient and practical, but will also be an effective presentation for any celebration. You don’t need a vase for an original gift, you can put it anywhere. This makes it convenient for broadcast in crowded places, cafes, cinemas..
The most spectacular box flowers are roses. To create a bouquet, you yourself will need to prepare an empty cardboard container of a suitable size, satin ribbons, a floral sponge, cling film, ficus leaves or fern for decoration.
First, you need to wrap the box with foil so that the cardboard is not saturated with water. The outer side should be decorated with wrapping paper, cloth or any material. We place a sponge in a container and insert prepared flowers into it.

Handbag with flowers
To create this composition, you should stock up on the following materials:
- rose (regular);
- eustoma;
- pink tape;
- large purple beads;
- carnations (flowers);
- resin seed;
- any fabric.

Execution process:
- It is necessary to wrap the wire along the entire length with tape.
- Further, the wire should be intertwined in such a way that it is given the shape necessary for the base of the frame of the future handbag.
- From the same wire you need to weave the handbag handles, and then attach them to the prepared frame.
- Satin ribbon can be wrapped around the handles for aesthetic appeal..
- The frame of the bag must be covered with a cloth from the inside..
- Now you should put a floral sponge soaked and wrapped in plastic wrap at the very bottom of the bag.
- In order for the flowers to completely enter the handbag, their stems should be appropriately cut, and then each flower must be inserted into a sponge..
- With the help of beads and a satin ribbon, weaving these objects together, you need to make a garland, and then it should be attached to the purse..
Bridal bouquet
Here you should prepare for execution:
- panicums (5 pcs.);
- decorative lace;
- pink organza;
- ruler;
- decorative plastic tape;
- beads, no more than 1 cm in diameter (15 pcs.);
- pink tulips (7 pcs.);
- green wire.

Execution process:
- A strip of organza, the width of which should not exceed 30 cm, must be folded in half, and then cut in the middle with scissors, dividing it into 2 parts. Repeat this operation with another strip, as you will need at least 4 shreds of organza.
- Each of these shreds must be folded in half and strips of 3 cm wide cut from them with scissors, but the incision should not reach the fold line.
- From these segments, it is necessary to collect lush flowers, twisting their legs together, and then, connecting them with a wire at the base, but one leg must be left long, so that its length corresponds to the stem of the decorative flower.
- Tulips should be placed within the same level, and panicums should be evenly distributed throughout the bouquet, the framing of fresh flowers will occur due to the organza details made in the previous step.
- All stems must now be tied with wire, twisting it as high as possible, in order to avoid loss of shape and decay of the flowers combined together.
- Using pruning shears, the stems must be trimmed to the desired length..
- Leaves from the stems must be carefully torn off and positioned around the entire circumference of the bouquet.
- Further, observing the utmost care, avoiding damage to the leaves of tulips, wrap the bundle with a plastic tape 3-4 times, fasten the bouquet.
- The ends of the decorative ribbon can be decorated with white beads.
Spiral bouquet
Any flowers are suitable for this composition. For greater convenience, it is recommended to choose those with dense and even stems. This can be, for example, chamomile or roses..

Execution process:
- Several peeled flowers must be folded tops so that they are in an upright position.
- Having shifted the workpiece to the left hand, you need to take the next flower with your right and, slightly tilting it to the right side, place it in front of the workpiece, but the next flower will need to be tilted to the left side.
- Repeat the operations from the previous paragraph with the only difference that now you need to fold the flowers from behind.
- Items 2 and 3 are repeated until the composition is finished. Along the way, adjusting the height of the buds is allowed, but do not forget to hold the entire workpiece firmly with your left hand. It should also be borne in mind that the flowers during this assembly should only touch the stems..
- Decor, when used, should also be added in a spiral.
- Greens can be added at the end. It is assumed that her bouquet will be as if wrapped.
- The bouquet should be firmly fixed with wire or decorative plastic tape, and the excess ends should be cut off with pruning shears..
- The stems need to be cut obliquely, then the bouquet can receive nutrition from the water.
Experts in the field of floristry recommend avoiding wrapping round bouquets, which include the spiral version, with mesh, paper or film. Small bouquets of no more than 15 elements can still be wrapped. You can insert a greeting card into a small spiral bouquet, wrapped, for example, with foil.
Parallel bouquet
Bouquets of this type can often be seen at weddings or in banquet halls..

Collecting a parallel bouquet is quite simple, for this you need to have on hand:
- flowers with large buds;
- fern or greenery;
- elements for decoration.
Execution process:
- It is necessary to make a “ladder” from the available flowers, laying them side by side so that the head of the next flower is lower than the previous one.
- The stems must be tied with tape so that they adjoin each other. Will use roses optimally.
- Next, you should add decorative elements and greenery around the flowers, remembering that they cannot be used to cover the upper part of the composition, which is represented by the buds..
- To make the bouquet more stable, you can use a wire frame.
- The stems should be cut evenly, after which the bouquet can be decorated with ribbons and bows, and wrapped in any material, if the situation requires it.
Enchanting dried flowers compositions
Compositions of dried flowers look very beautiful. They are durable and require almost no further maintenance. A bouquet of dried flowers can be made in a decorative tree or vase. One of the most important stages in the composition of a bouquet is the selection of the required flowers and their drying. You can choose tall roses, gladioli.
As an addition to the bouquet, eucalyptus leaves, poppy flowers, yarrow, dried fern leaves are suitable. As a rule, dried flowers are not very bright, so you can color the plants or use additional elements as decoration, for example, peacock feathers.
The most popular dried flower arrangement is a regular bouquet. To create it, you need dried flowers, a vase, decorative stones and filler. The bottom of the vase should be filled with floral foam. If there is none, you can use the usual mounting room, filling it with cellophane, thereby preserving the walls of the vase.
Trim the stems of the dried flowers to the required length. You need to make a bouquet starting with the highest flowers that form the shape of the future composition. Rotate the vase, complementing it with natural materials, so that the bouquet looks harmonious from all sides. Stones should be added as desired. In a transparent vase, they will not only be a decoration, but also make it more stable..
The finished composition of dried flowers should be placed away from the window so that as little sunlight as possible gets in.

Technique “Wrong”
Floristry for beginners also step by step affects the Japanese technique “Oshibana”, which in a certain sense can be classified as painting, since pictures are created with its help.
The difference from classical painting is that the “artist” here, instead of paints or on a par with them, uses plants dried using a special technology. It can be not only flowers, but anything you like: fruits, peels, berries, bark, seeds, and so on..
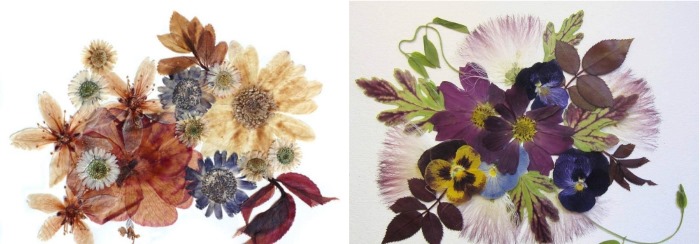
To perform compositions in this style, you will need:
- tweezers;
- colour pencils;
- a piece of cloth;
- hot glue gun;
- paints (watercolor);
- tracing paper;
- colored paper or cardboard;
- PVA glue.
Particular attention should be paid to the collection of material. This should be done exclusively in dry weather. Each plant must be carefully inspected for mold and insect larvae, and if any are found, the plant must be discarded. Dirty and dusty plants, if possible, should be cleaned, if not, then discarded as well..
After collecting the material, it must be dried. For this, you can use books under load, or old newspapers. The load should be selected individually for each plant, so as not to spoil the material.
Delicate plants should not be pressed over 20 kg. If the material is too fragile, then the maximum weight of the press is 5 kg. A press is suitable for coarse plants – up to 40 kg.
It is not forbidden to dry large juicy leaves with an iron through special paper or newspaper. The dried material should be stored in a dry, dark place, previously packed in folders or CD boxes.
Composition process:
- First you need to decide on the plot of the picture. If a large amount of light details is expected, then the background should be used in a dark color, and vice versa. Colored paper or cardboard acts as a material for the background, which can be colored a little with paints or pencils. Various fabrics can also be used for the background..
- Having decided on the plot, a sketch should be applied to the main background with a pencil, followed by tracing it on tracing paper.
- Elements are cut out of tracing paper, on the basis of which plants are selected for use in the composition.
- Plants, cut to the required size, need to be laid out in accordance with the idea on the main background.
- It is not necessary to thoroughly coat the parts from plants with glue, it is better to apply it in a thin layer and carefully attach the parts to the canvas.
- As a final step, the painting will need to be placed under the load..
Remember that paintings made according to the “Oshibana” technique are categorically not recommended to be placed in open sunlight, as this can lead to its rapid fading..
Ceramic method
Ceramic floristry involves the use of polymer clay to create bouquets of flowers and various crafts.
As an example, an embodiment of the bell with a ceramic method will be considered..
To make it you will need:
- pencil;
- PVA glue;
- clay;
- paints;
- rolling pin;
- threads;
- small tin strip.
Execution process:
- You need to make a bell pattern and bend a tin strip according to its shape.
- Now you should take clay and mix it with a solution of water and paints to get approximately the color that you would like to see in the end.
- Using a rolling pin, you need to roll out the clay and then with a knife you need to cut out several patches in the shape of a flower-like.
- With your fingers on the back of the flower, you need to create small ribs;
- Fingers need to glue the edges of the flower and pinch in the shape of a cross, making movements with them up.
- To create a stamen and pistil, you need a thin layer of clay, rolled up with a sausage, cut into 3 small pieces from one end, and then glue the “pestle” there, framing it with yellow threads.

- Now you can put on the bell.
- The sepal is made using the same technique and glued to the base..
- Finally, you need to roll the leg with clay and tint the flower with oil..
Packaging as part of the composition
Plain paper is in trend. Lace patterns, satin ribbons and even large rope weaving can add charm to the bouquet. Untreated linen is suitable for fabrics.
Grids are increasingly considered an outdated trend by florists. Polyethylene can only be used as technical packaging, this material is not used as decoration for the composition..
Bouquets-figures
Flower arrangements in the form of figures of bears and bunnies are becoming more and more popular. Such a gift will amaze any young girl, especially if it is made by hand. They are also made for various holidays in kindergarten. First of all, we choose a stable base. It can be any flat support, for example, a tray, a large dish. The main thing is that it does not let moisture through.
At the next stage, we make an animal frame from a floral sponge. We cut out parts of the body, soak them in water and fasten them with skewers. It should be remembered that flowers will still be inserted into the base, so it is necessary to imagine the size of the future craft in advance..
Any fresh flowers, even unopened buds, are suitable for a bouquet. The heads are cut off and inserted into the sponge according to a conceived plan. The eyes, mouth and nose of the composition are made of prepared beads, additional accessories. More often chrysanthemums are used for bouquets-figures. They are unpretentious, varieties and types are represented by a huge variety of colors..

Simple home arrangements
Making compositions of fresh flowers with your own hands always begins with the preparation of plants. It is necessary to completely clean the part of the stems that will be in the vase so that the water does not rot.
Then the cut is refreshed so that the flowers absorb moisture more intensively. This should be done only with a pruner or, in extreme cases, with a clerical knife, but not with ordinary tailor’s scissors. Otherwise, the capillaries will crumple and deform, through which water and food flow through the stem to the buds and they will quickly sink.
Lush arrangements – “rattles” are collected in the hands and only then placed in a vessel with water. It can be not only a vase, but also something less traditional – a garden watering can, an earthenware jug, or a galvanized bucket. The flower stems are pre-tied so that the plants do not crumble.
Garden mix
Fresh flowers from the garden itself are just asking for a vase. However, so beautiful in a flower bed, they immediately turn into a messy mass when trying to create the simplest composition out of them. Fortunately, there is an excellent life hack, invented especially for beginner florists – division into sectors using adhesive tape..
You will need:
- any garden flowers:
- a vase with a wide neck;
- narrow tape;
- scissors.
After pouring water into the vase, wipe the edges thoroughly with a paper towel. The tape will not stick to the damp surface of the vessel.

Cut off the strips of the desired length and glue them on the edges of the vase in the longitudinal and transverse directions. As a result, you should get a mesh with holes of about 2×2 cm.Now it will be much more convenient to distribute flowers.

We start with the smallest ones, for example, spray roses or chrysanthemums. We arrange them around the perimeter in a spiral technique – the stems touch at one point and are located at an angle.


To make the mix look harmonious, it is better to choose flower buds of the same color range for it – warm or cold. In this case, spray roses with a powdery gradient and orange safflower were used, and an amber-yellow sunflower acted as the main accent. The desired contrast was achieved with the help of greenery, which not only effectively emphasized the buds of nuanced shades, but also created an expressive texture..

A charming summer mix will be the best decoration for a kitchen or a summer cottage. Tea drinking in such a “company” will bring incomparable pleasure.

Arranged in shades of burgundy
Bouquet arrangements of fresh flowers are often used to decorate wedding interiors. An interesting solution for a wine-style celebration is a combination of dark red and bluish green plants. Luxurious arrangement on piaflora, in an old silver vase with a high leg, is suitable for other special occasions. It is placed in the center of the table..

The bouquet has the shape of an inverse crescent, created by the hanging branches of two varieties of eucalyptus – cineria and populus. Also used for it: anthurium, terry tulips Wedding Gift and anemones.

Before proceeding with the assembly, the plants must be watered, leaving for several hours in settled water at room temperature. After that, all the stems are cleaned, the cut is refreshed and the components of the future floristic masterpiece are laid out on the desktop according to types and varieties. This will allow faster assembly, without being distracted by the search for the desired element, and the flowers will stay less without water. The necessary tools are also placed there: pruners, scissors, anchor tape, floral wire and toothpicks. The last to pierce the piaflor when setting tulips, which have a soft stem.
We saturate the floral sponge with water and attach it to the flat bowl of the vase using anchor tape. Next, we begin to shape the silhouette of the arrangement using eucalyptus. Elder branches with hard, bright leaves are used to create density in the center..
Experienced florists recommend taking at least 3 types of greenery for European bouquets in order to create a play of textures and volumes.

Next, we place large anthurium buds, creating bright accents. These are the so-called focal flowers, focusing on themselves the main attention of the viewer..

The density in the center of the arrangement is created by tulips, which are arranged in groups, following the “Fibonacci number”. That is, there should be 3 or 5 tulips near 1 anthurium. At the end of the assembly, add anemones in places where filler flowers are unevenly located..

Compositions of fresh flowers “on the” oasis “, like the one shown in these photos, are intended mainly for festive decor. And everyday arrangements are best done in a vegetative style that is fashionable today, copying natural counterparts: a corner of a blooming garden or meadow. With outward simplicity, this direction requires experience and well-developed intuition, since there are no strict rules, except that all elements have a growth point where the stems should converge..
Vegetative composition “Spring Garden”
A parallel technique of plant placement with multiple growth points is used.
You will need:
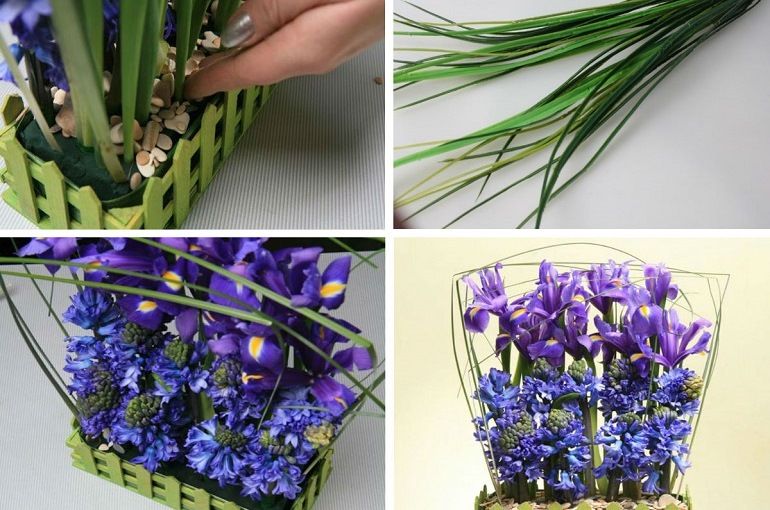
- irises, hyacinths, statice;
- decorative wooden box;
- pebbles (you can buy at a pet store intended for aquariums);
- floristic sponge (piaflor), gerber wire (drut), polyethylene film “mica”, building knife, pruning shears.
We lay out the bottom and side walls of the box with a film to protect it from moisture. We cut the piaflor to the size of the container, soak it with water and put it inside. We strengthen the stems of hyacinths with gerbera wire, inserting it about half the height. We also make several turns outside the “leg” and mask them with green tape.

We cut the stems of the irises obliquely with a sharp knife or pruner and set them in the piaflor, adhering to the vertical direction. We try to immediately maintain the exact distance between the flowers, so as not to rearrange them, violating the integrity of the “oasis”. The next row will be hyacinths. They shouldn’t overlap the iris buds, so we make them a little shorter. For greater splendor, we fill the free space with a statice..

With the help of pebbles, we mask the remaining uncovered piaflor. To give a hand-made flower arrangement dynamics, we use steelgrass. From this ornamental plant, you can construct graceful frames, realizing very interesting design solutions. Usually, stealgrass is used for the avant-garde style, but in the vegetative style it will also find a place – you get an imitation of meadow grass drooping in the wind.
Autumn bouquet in concrete

Nondescript building material today successfully replaces the most exquisite glass and porcelain vases. Florists are attracted by the contrast between the cold stone mass and the beauty of living plants full of colors..
To achieve the desired effect, it is not at all necessary to mold heavy concrete planters. For interior compositions, you can get by with less effort, with a wonderful result.
Useful Tips
Not a single experienced florist can do their job without a little trick:
- Consider the gender of the person when composing the composition. If the bouquet is for a woman, it should be round. A bouquet for a man should be elongated..
- Combine different flowers in one bouquet. A composition of no more than 3 types of flowers looks great – for example, use white and pink tulips, complemented by hyacinth branches.
- Almost any material is suitable to create a unique bouquet, do not limit yourself to just one film – it can be a box, colored pencils, and more. The main thing is not to overdo it with details..
- Use closed, slightly open and open buds. This little trick will help the bouquet last as long as possible..
- Do not be zealous with greens: a few small leaves will perfectly fit into the composition and complement it, but against the background of an armful of leaves, flowers may fade. And remember that greens should not be higher than the flowers themselves..
- Distribute buds of different colors correctly. Arrange light buds around the edges, and place flowers of dark and bright shades closer to the center of the bouquet.
- Either exotic or wildflowers are used in one bouquet. Try not to mix them up.
These recommendations will always help you create a stylish composition..

Secrets of the masters
Each professional has his own experience. And someone else’s experience can be useful in a variety of cases..
- Collect bouquets with an eye on the floor and the person’s preferences. “Female” – round, “male” – elongated.
- Combine different colors and flowers in one bouquet. Variety is better: at least three different species are used. For example, white tulips, yellow asters and red roses go well together..
- Closed and slightly opened buds are a reason to indicate that the bouquet will still show itself in all its glory.
- Do not overdo it with greens: it should not distract attention from the primary colors. In terms of location, it should not be higher than the buds..
- Place bright and light buds, respectively, in the center and along the edges of the assembly..
- Do not mix rare and common flowers such as chamomile and edelweiss.
If you follow these rules, your level and volume of bouquets sales will increase. And you will prepare bouquets for your family and friends that you cannot buy anywhere.

Video master classes to help budding flower designers
1) The first lesson in floristry. Bouquet “Caramel”.
2) Floristry: the secret of a simple bouquet
3) Master class in floristry for beginners
4) How did I become a florist? // My first bouquet
5) How to make a frame for a winter bouquet
6) Spiral technique on the example of white bouquets
7) Arrangements in baskets

Bouquets for September 1st
9) Decoration of the premises for the New Year
10) Bouquet of dried fruits / Floristry
11) 10 tips for aspiring florists
Flower arrangement ideas using improvised equipment
In order to bring to life your ideas of flower compositions, you need to “arm yourself” thoroughly. Don’t be confused by the large number of tools and other equipment illustrated and described on these pages. Only a few (bucket, scissors, knife and watering can) are basic necessities for the beginner – the rest are optional. Keep sharp objects such as scissors and knives out of the reach of children and try to keep all tools together in the box. When arranging flowers, place a large plastic sheet over your work surface..
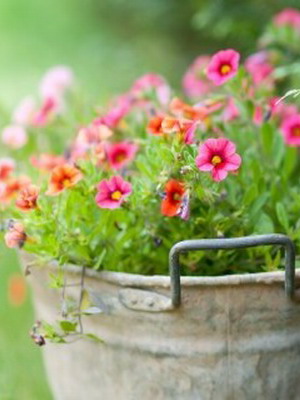
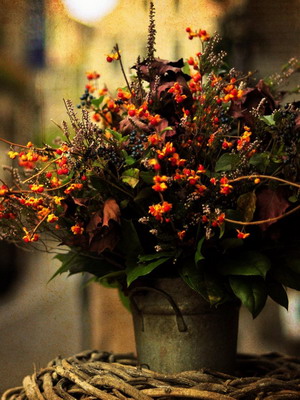
A bucket of water is a necessary piece of equipment for collecting flowers from the garden and storing them when creating an arrangement. Choose a bucket with side handles, as the standard handle swings freely and can damage the flowers during transport. Don’t use a floristic bucket in the kitchen.
Cut flower preservative in powder or liquid form mainly contains bactericidal substances to prevent mucus and odors developing in vases of water, and sugar to prolong the life of fresh flowers.
Buy a knife with a sharp blade for all kinds of uses. You will need it for peeling stems, removing leaves, and getting rid of thorns. It is also used to treat the ends of stems – oblique cuts and sometimes vertical splits. There is also a need to cut the floral sponge and remove excess molding material..
A watering can is needed to add water to the container and moisten a floral sponge with a composition of fresh flowers. Buy plastic ones with a long and narrow spout starting at the base of the watering can.
Never try to cut thick and woody stems with regular scissors – use pruning shears instead. You can buy a regular garden pruner, but there are also models with narrow blades made especially for florists..
A hand sprayer capable of producing a fine mist of water droplets helps keep the composition fresh in warm weather. Spray the fog just above the top of the composition. Do this once when the arrangement is complete and repeat as often as possible daily..
The most common scissors are not suitable for cutting stems – they tend to crush tissue. Choose flower scissors with short blades, one of which is serrated. There may be a groove in the base – use this for cutting thin wire, but not for woody stems.
Use wire to tie tufts of cut flowers together. There are three main types of wire. The thickest one is sold in the form of blanks. The wire for tying roses and other flowers is thinner, and the thinnest is wound on a spool – it is widely used by florists for tying plant material.
Toothpicks are a convenient multifunctional assistant. Use toothpicks to punch a hole in the flower sponge for soft stems or to attach the fruit to the flower sponge. Several toothpicks are sometimes screwed around the base of the candle to secure it in a tabletop arrangement..


Aerosol paints can be used for finishing flower arrangements at any time of the year, but they are especially relevant at Christmas – arrangements with gold or silver pine cones, berries, leaves and flowers can be seen everywhere. Paints are widely used on vessels, fasteners, stands, etc., as well as on plant material.
Purchase the necessary hardware. Placing flowers in a vase or jug of water is an ancient way of creating flower arrangements, but almost all modern arrangements need to use materials that hold the leaves and flowers in place within the container. These materials and related aids are known as fasteners. They must be securely fastened and hidden from view. Only a few (floristic sponge, floristic plasticine, arranging mesh and frog clamps) are essential items – the rest are optional..
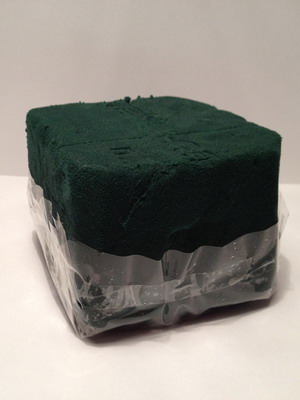

A floral sponge (also known as floral foam) is a porous plastic invented in 1940. It has become the main method of attaching flowers for home decoration. There are two types – the green “frog” sponge, which is soaked in water and then used for fresh plant material, and the brown or gray sponge, which is used only for dry and artificial compositions. The green sponge comes in various shapes – blocks (“bricks”) and cylinders are the most popular. It is a very light material, but its weight when saturated with water increases more than 30 times. This green sponge should never dry out after soaking it..
If you wrap it in foil or plastic wrap after use, it may be suitable for a few more arrangements. The great advantage of the sponge is that the stems can be located at any angle, both in shallow and deep vessels, and the problem of water decay is eliminated. It has few disadvantages – for a large composition, additional support with a wire net is required and some plants (for example, daffodils and tulips) hardly absorb water from it..
Adhesive tape is available in both wide and narrow versions. The wide band is mainly used to secure the floral sponge or wire mesh in the vessel. Narrow ribbons are sometimes stretched across the top of a shallow, wide-necked vessel in a criss-cross pattern to form a plant-retaining net..


The retainer is the simplest type of sponge attachment. It is a small plastic disc with four vertical prongs – the base is attached to the container using plasticine, and the block or cylinder of the floral sponge is pushed onto the prongs. If using a large floral sponge block, more than one retainer may be required.


Floristic plasticine is a non-hardening sticky substance in the form of a tape that holds dry surfaces together. It is widely used for fixing a frog, tattoo or candle holder in a container and comes in brown and green. Ordinary plasticine can be used as a substitute.


A tattoo (also known as kenzan) is needed to support a handmade flower arrangement in the shape you need. Many sharp pins are held firmly in a solid base, which can be round or rectangular. Its main advantage is that it will securely hold thick and heavy stems. Tattoos can be used on their own in a shallow bowl or in conjunction with other mounts for a large composition in a deep container. Choose a model with a heavy base and lots of sharp copper pins. The disadvantage of this mount is that it is expensive. If you can only afford one, choose a 8 cm round one. Attach it to the base of the container using floral clay. The tattoo can be built into the bottom of a metal bowl that retains water. In this case, there is no need for an additional vessel..


Floristic test tubes (also known as flower extensions) are miniature vases that are used in large flower arrangements where the leaves and flowers must be placed higher than their stem height allows. They are usually about 30 cm long and have a pointed end, usually attached to a stick, which is then stuck into a floral sponge or wire mesh. Fill the tube with water before inserting the stems.
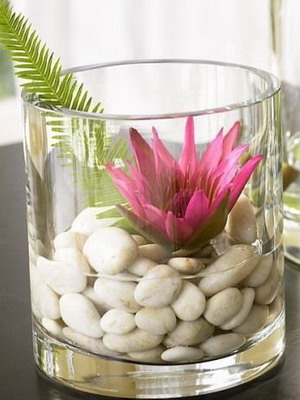
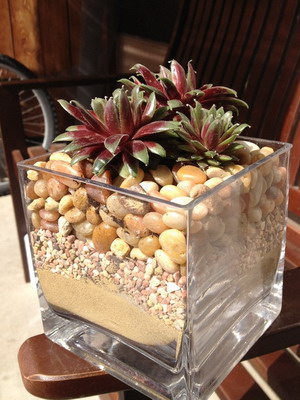
Small pebbles, round and flattened glass beads have long been used to hold cut flower stems. With such an installation of the stems, there will be slight mobility in the arrangement..


Arranging mesh (also called wire mesh, loop wire) may also be needed when composing a composition of indoor flowers. Buy a thin mesh with 5 cm meshes. Cut a hard edge, roll up into a tube, crumple into a ball and place in a container. Wire mesh is the preferred fastening method for arrangements with many tall or heavy stems. A 3 cm mesh is often used to cover a floral sponge block if a large composition is planned. Some specialists prefer a galvanized mesh with a plastic coating. Be careful not to scratch the sides of the valuable vessel with it. Wash and dry the mesh after use – it can be reused.
