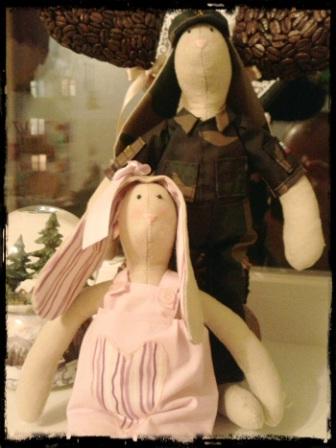
We sew a doll Tilda master class – soldier.
Tilda doll gained incredible popularity in Europe, and today it is in demand with us. These toys are ideal for interior decoration, as well as an original hand-made gift. Tilda dolls are any items made according to patterns by the artist Tone Finnanger from Norway. In this article we will show you how to make Tilda and turn her into a military hero with your own hands..
Materials for our toy soldier:
– threads;
– leatherette;
– fabric for the base and fabric for clothing;
– sewing machine;
– synthetic winterizer;
– paper;
– pencil.
See also: Airplane – military crafts
Master class: we sew a Tilda doll – military
1. Make a pattern according to the Tilda-hare template and transfer it to the material.
2. Carefully cut out the details and connect with pins. There should be 4 in total – for
arms, 4 – for the legs, 2 – for the torso, 2 – for the legs and 2 – for the ears (so that the ears are beautiful,
make one side the body color and the other side the clothing color).
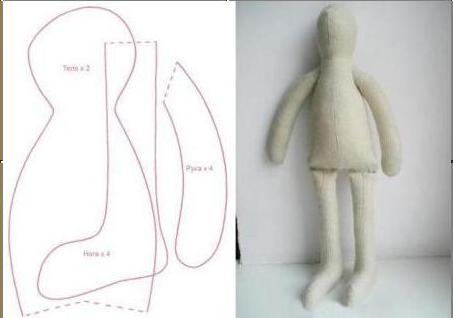
3. Sew all these parts on a sewing machine with a step of 1-2 mm..
4. Carefully unscrew the parts so as not to damage the seams. Do it
you can use a pencil or pen.
5. Fill the torso, arms and legs with padding polyester, but not very tightly. Do not fill your ears
necessary.
6. Sew on the ears, legs and handles with a blind seam to make the toy look neat.
7. When you sew on the elements, look to make the parts of the bunny.
the same length and he could sit.
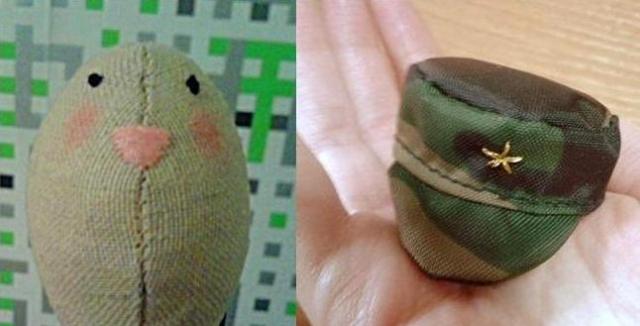
8. We embroider the muzzle with threads, you can also use acrylic paints.
9. When the body is ready, we start sewing a military uniform.
10. Even for the same pattern of Tilda-hare, different toys can be obtained,
therefore, we recommend that you make a careful fitting for sewing clothes.
11. Trousers consist of 2 legs, so we make a pattern on the fabric and sew.
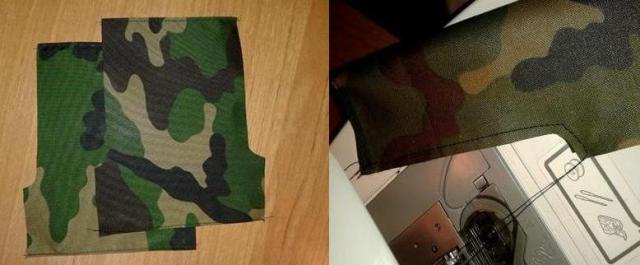
12. Let’s start sewing a jacket. To do this, you need to make a pattern for the back and two
front shelves. Remember to leave armholes when sewing on the side pieces.
for sleeves.
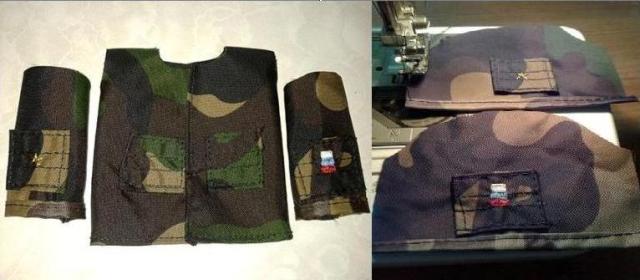
13. Let’s make pockets for the jacket. To do this, you need to cut out two squares, sew
it around the perimeter and then make a few decorative stitches.
14. Sew the pockets by hand to the jacket.
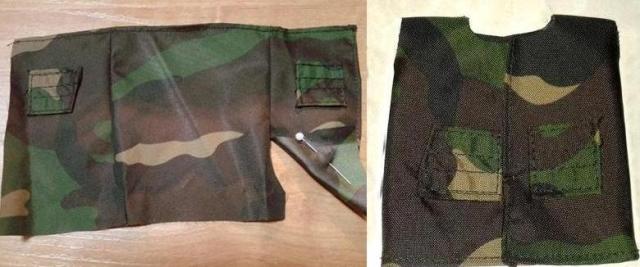
15. Make a Tilda sleeve pattern on the fabric and cut out. On the sleeves you can
sew the same square pockets as on the jacket. Now sew the sleeves.
16. In the jacket, make a cutout for the neckline and sew the sleeves into the armholes..
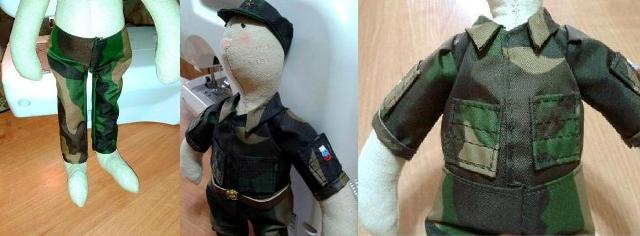
17. To make the jacket look more solid, you need to make a collar. To do this, cut out
a rectangle with a length equal to the length of the neckline, and 3 times as wide
finished collar.
18. Bend the rectangle slightly obliquely to make 45 degree corners.
Fold them inward, and sew the raw edge of the collar to the neck of the tunic.
19. Now start crafting additional equipment for Tilda.-
military.
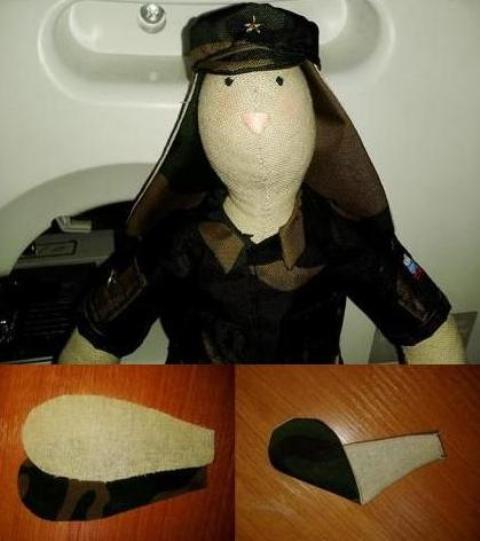
20. You need to make a suitable cap. To do this, cut out a circle of fabric with a diameter of 4
cm.For the side part, cut out a rectangle, the length of which will be slightly longer
the diameter of the circle. Tuck the side part on one side and sew, and on the other
sew the sides to the circle. Make the visor of the cap. To do this, you need to cut two
semicircles, sew them together and sew to a ready-made cap.
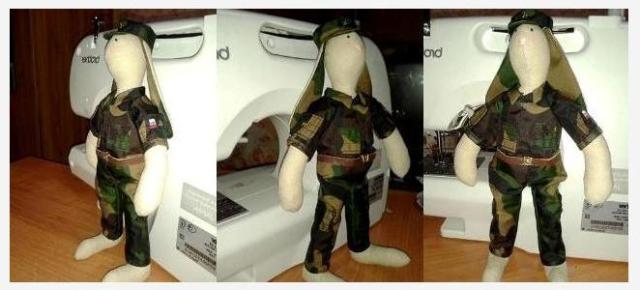
21. A harness or belt is made from a piece of leatherette or leather. The plaque can be
embroider with gold thread, if you do not find suitable accessories.
Watch the video: Master class on creating a Tilda doll
For sewing Tilda dolls, they most often take natural fabrics, such as linen or cotton.,
but skilled needlewomen learned to work with synthetic materials. Colour
torso fabrics often imitate skin color, so it is best to choose white and
beige tones. Imagine, and your Tilda will pleasantly surprise and delight those around you. See all crafts in the DIY Crafts section of our website.
