In the good old days, on the eve of the New Year and Christmas holidays, the whole family was busy preparing for the Christmas tree, including making Christmas tree decorations. Why not repeat this good tradition now? It will be useful for children to learn from the elders the techniques and ideas of making, and the elders will have the opportunity to spend time with the children, teaching them something useful. How to make original Christmas toys with your own hands? If you want to know a few ideas, then in this article you will find everything you need. As a rule, special skills and materials are not required when making jewelry. Now there are a lot of all kinds of multi-colored synthetic fabric, let’s try to create a New Year’s ball out of it.
Very beautiful Christmas toys
Synthetic Christmas ball.
If your goal is an original DIY Christmas toy for the competition, then the first toy will be just such an option.

For work, prepare:
- foam ball as a base.
- synthetic fabric in two colors.
- scissors.
- glue gun.
- a few pins.
- optional beads, for example, pearls.
Progress:
- For convenience, you can purchase a satin ribbon at handicraft stores, it is easier to cut it into squares, and instead of a glue gun, superglue will do just fine..
- So, we harvest squares from fabric or from a tape 5×5 cm.Cut the protruding threads so that they do not interfere, it is not necessary to process the edges.
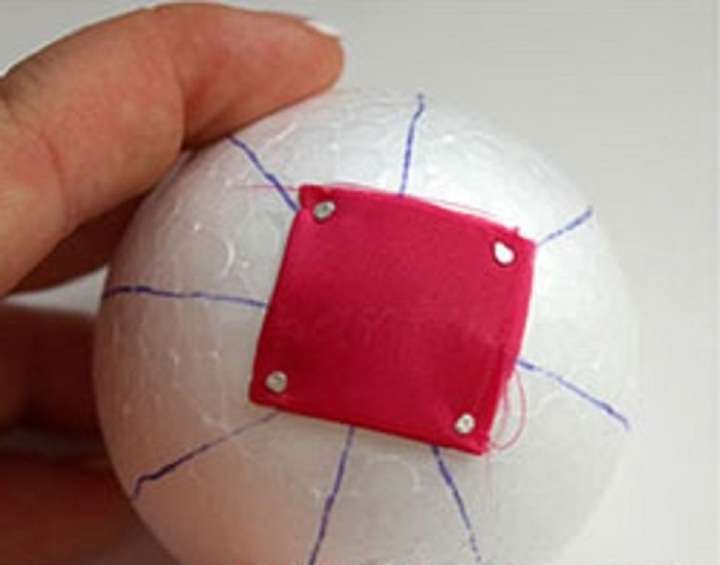
- Next, we are engaged in the ball, it must be divided with a marker first in half, then in half again, and again, the angles of the sectors are approximately 45 degrees.
- Now we pins the first square right in the center of the marked ball..
- Squares folded in half will look the most advantageous, neat. You can fix them both with glue and with pins, but the glue will still be more reliable. The first layer includes 4 squares located without touching, and so that the very first square is visible between them.
- Next, alternating colors, lay out the next layer according to the same principle, loosely touching, through it the previous layer will be visible, another in color.
- There can be no more than 4 rows with one color, the rest must be of a different shade.
- You can wind it in a spiral, decorate the ball with beads, securing them with glue.
- The ball can be simply put on the branches of the Christmas tree, or you can attach a lace in the form of a loop on either side and hang it.


Ball with a tail.
In our article, we offer our readers the most beautiful New Year’s toys. This option is very similar to the first, but here a bump is already formed, and a tail is attached.

For her you need to prepare:
- foam ball for base.
- synthetic fabric, can be satin ribbon 5 cm wide.
- scissors.
- glue (glue gun can be used).
- eyelet from the Christmas tree.
Progress:
- An interesting option will be obtained from fabrics of three different colors. Let’s say silver with blue for the bump itself, and the cap under the eyelet will be white. It can be borrowed from a finished Christmas tree toy..
- We also cut the ribbon or fabric into 5×5 cm squares, but we no longer bend them in half, but in the form of triangles.
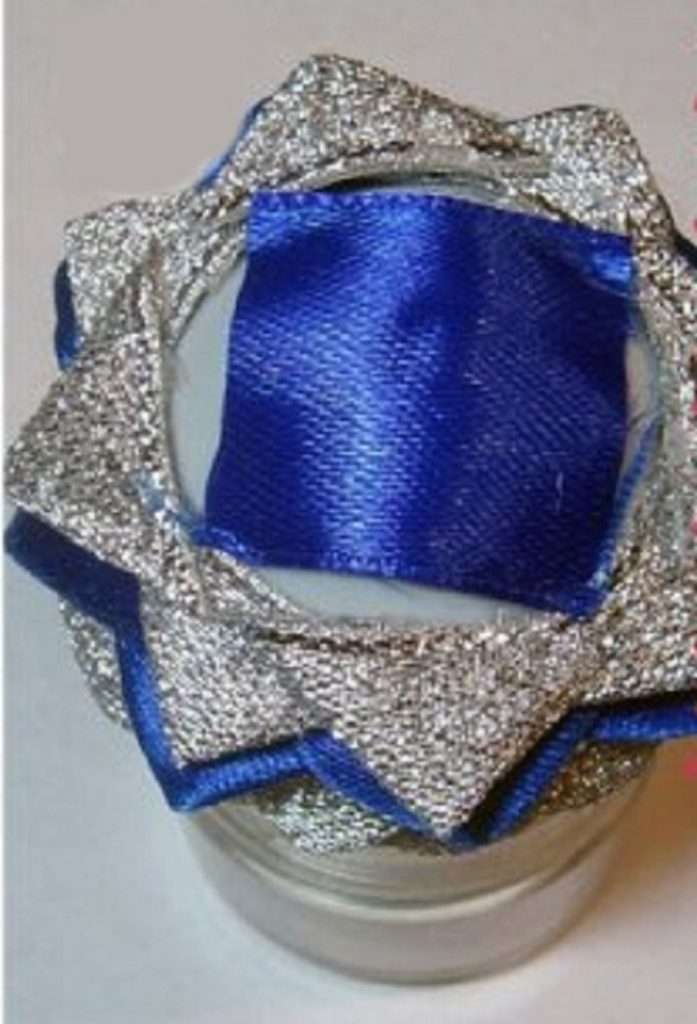
- We begin to glue from a blue square, also to the center of the marked ball. For convenience, the ball itself can be placed on the neck of a small can of a suitable diameter.
- Now we fix 4 squares folded in triangles so that they do not touch each other, between them the first square was visible.
- After that, blue triangles go into 2 layers again, gradually moving away from the beginning of work. There should be no gaps. When half of the ball is passed, you can turn the ball upside down to complete the job.
- The blue ones are again followed by 2 silvery layers. On the other pole of the ball we immediately glue a solid square to avoid gaps.
- To the top of the triangles we glue closer and closer to each other, their last row forms a square window.
- Now we make a hat from a white satin ribbon. To do this, it is lightly gathered on a thread for a wavy effect..
- Then we glue the tail, and your festive Christmas tree cone is ready!


Crochet toy.
A very interesting specimen will be able to supplement our selection called beautiful New Year’s toys for the Christmas tree. Needlewomen probably have leftovers of yarn of various colors. For such a knitted ball, even a base is not needed, and with skillful handles it will contact in 15 minutes.

- So, we have prepared the threads and the hook, you will need another synthetic winterizer for filling.
- Toys stuffed with padding polyester can be washed without fear of rolling, which can happen with cotton filler.
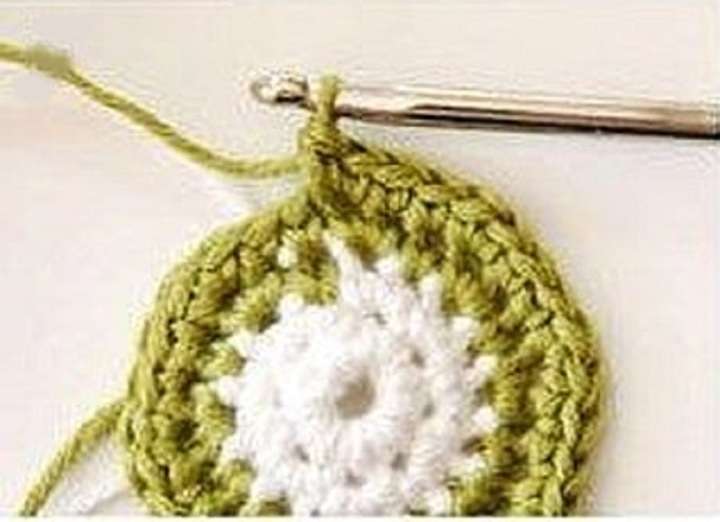
- We start with 4 loops, more of them can form an unnecessary hole.
- Now each loop must be knitted twice. We knit the next row in the same way..
- Next, for a striped pattern, take threads of a different color. We try to leave knots of connection of different threads from the wrong side.
- We knit 2 rows with this thread, then we return to the first color. We gradually build up the loops so that the ball grows in width.
- You can make it not two-color, but multi-colored, depending on your desire and the availability of several colors of yarn.
- So we knit in 2 rows, then we begin to decrease the loops so that the ball begins to taper towards the end of the work.
- We get a small hole, which we use for stuffing inside the padding polyester. Do not fill too tightly, the balloon should retain its shape, but also be airy at the same time.
- On the last loop, a more thread should be pulled out to tie a loop, for which the ball can be hung on a Christmas tree.


Dog as a symbol of the coming year.
A merry dog as a symbol of the upcoming ode will decorate any Christmas tree. It is better to first cut the templates for this craft out of cardboard, and then transfer to fur.

For a dog you need:
- artificial fur.
- felt or similar material (very little).
- eyes and nose made of plastic.
- for the nose, you can use wool for felting.
- padding polyester.
- Super glue.
- needle, thread, scissors.
Progress:
- We print templates on cardboard or draw ourselves.
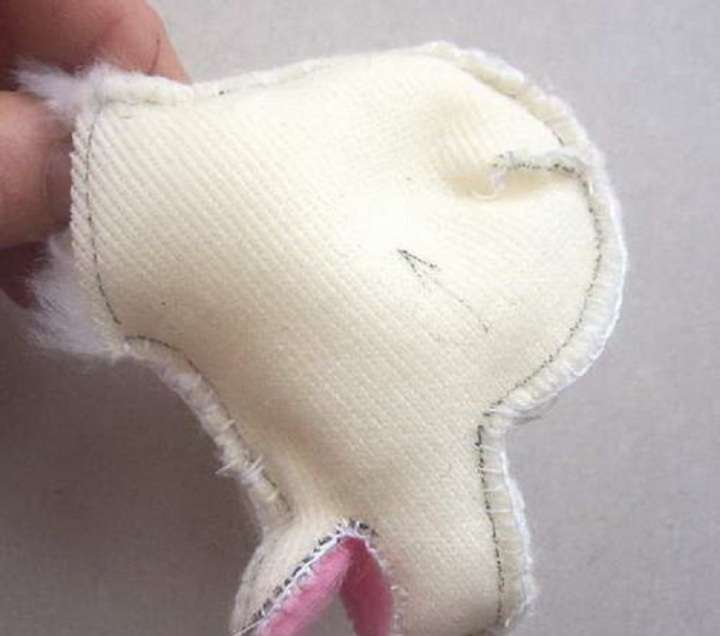
- We translate it into fur and cut it out, then sew it in pairs from the inside, then turn it out with the fur. The head is made up of three rather than two parts to give more volume.
- On the face, it is necessary to make slits for the mouth, in this incision we fix the pink fabric, this will be the tongue. We sew it with a whipstitch, Now we turn it out on the face and evaluate our work.
- Then we arrange the recesses for the eyes, for this we lightly stitch the head with threads 3-4 times. Now we glue the finished nose, or dump it out of wool, in this case we make it denser.
- Do the mouth of the dog at your discretion, it can be closed, or maybe with a pink tongue.
- The hollows under the eyes can be enlarged with a needle, and the eyelids can be made with white wool.
- It remains only to fill the toy and sew it up completely. It is better to bend and glue the ears to the middle, then sew to the desired place.
- Such a dog can be planted on a Christmas tree, or you can place it on the New Year’s table as a decoration..


Finally
We talked about how to make beautiful New Year’s toys today. Only some possible crafts have been presented here, in fact, you can make a lot of them from clay, salt dough, children will especially appreciate the benefits of sculpting.
